
Nextcloud Backup, Restore and Migration Guide
This guide can will walk through the process of backing up and existing Nextcloud installation and how to restore or migrate that installation. This guide utilize HostPath or NFS for UserData.
Backup
Backup Database
If you have not already done so install PGAdmin and the tcdbinfo.sh script
-
Run the tcdbinfo.sh script and take note of the connection info
List Database Info bash tcdbinfo.sh
-
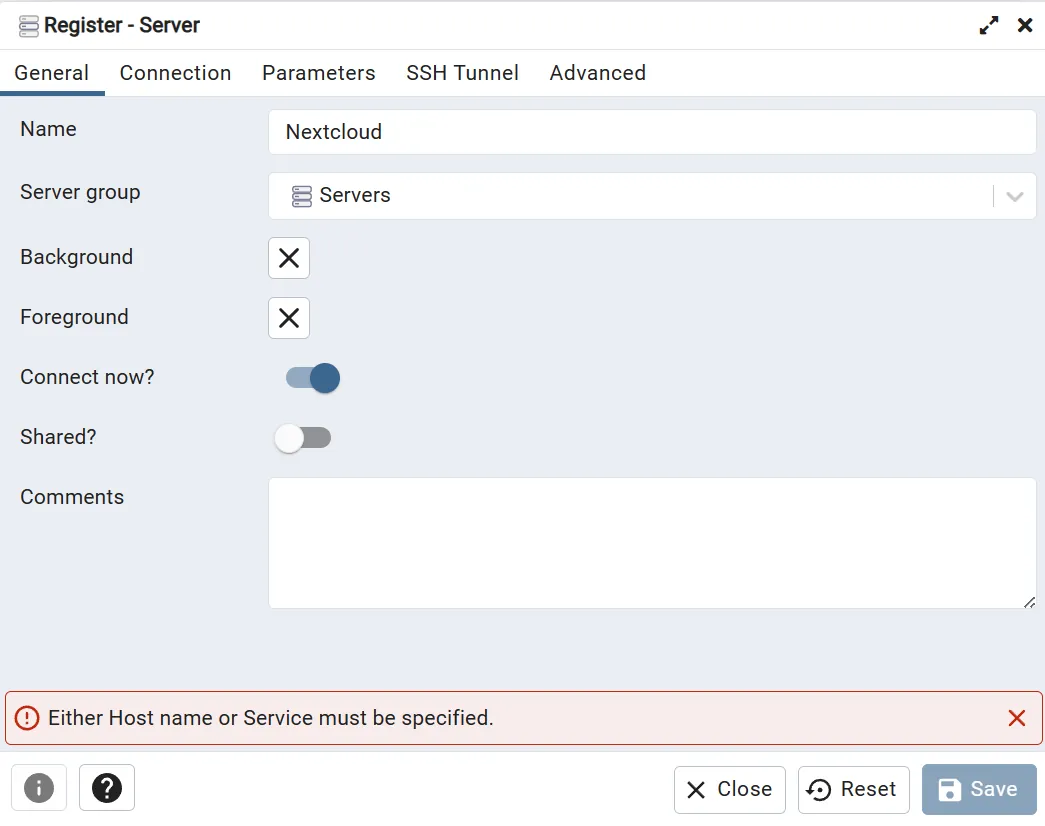
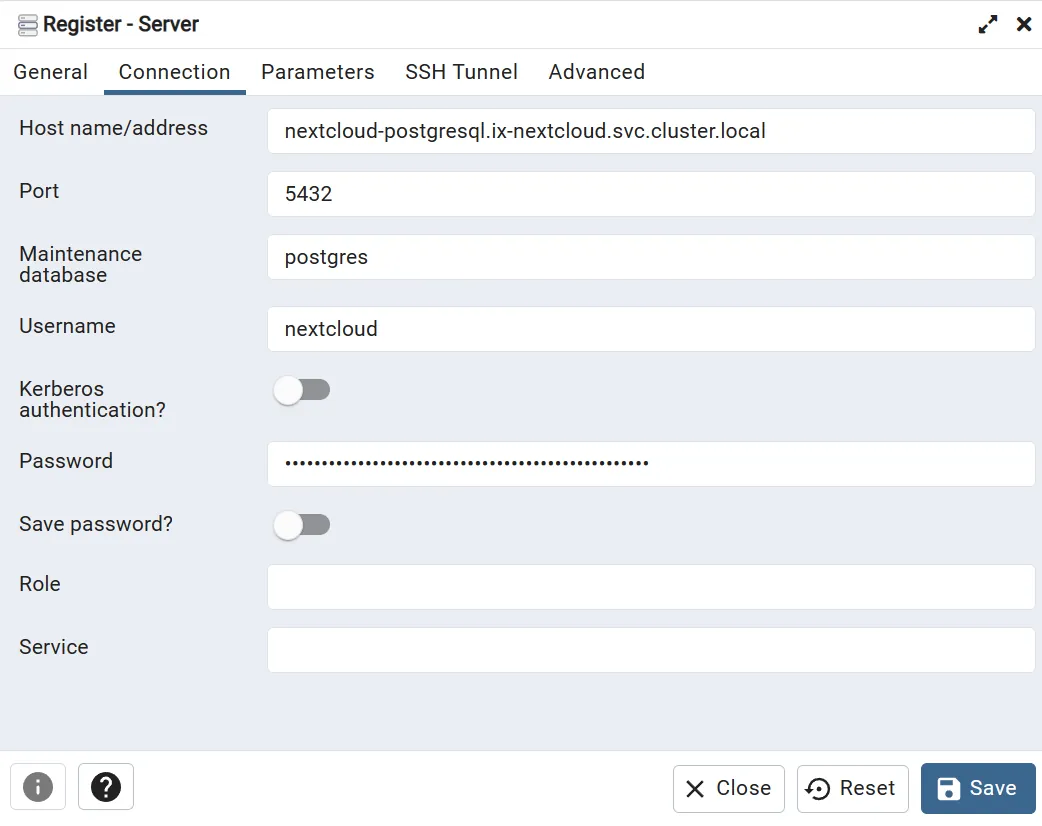
Add Nextcloud to PGAdmin using the connection info from previous step.
-
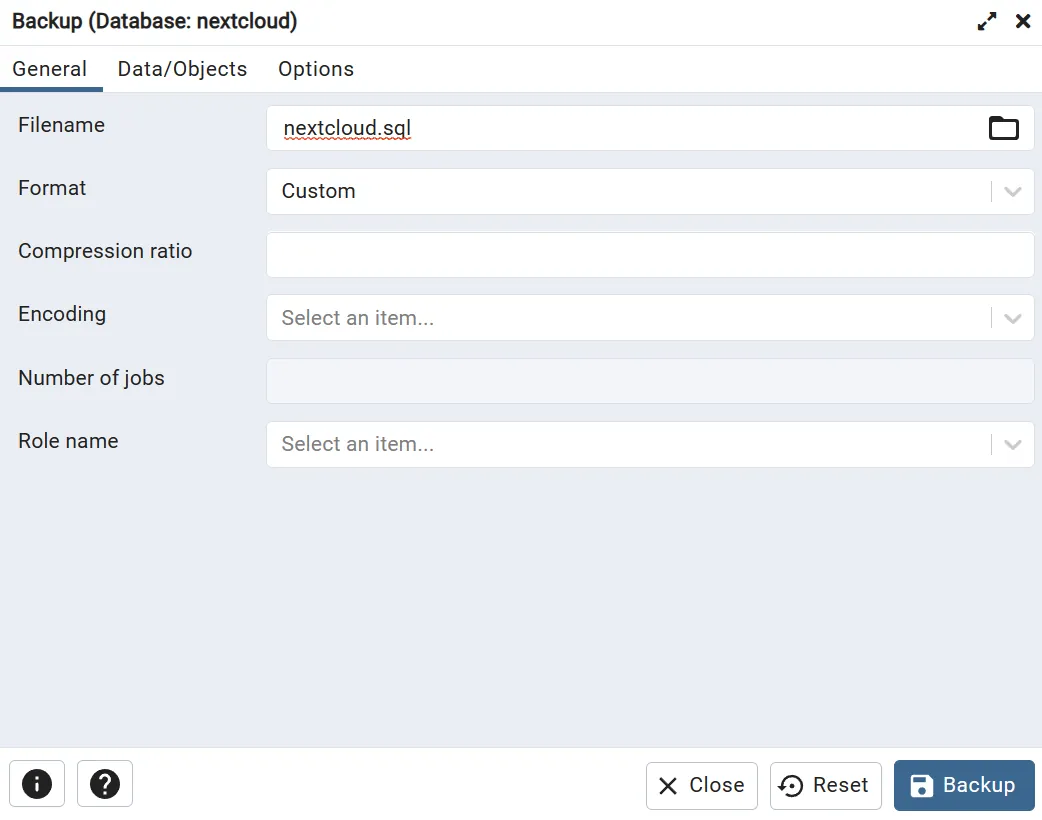
Backup Nextcloud database.
Backup User Data
If you are using HostPath of NFS for UserData then no further action is required. If you are using PVC for UserData then you will first need to mount your Nextcloud PVC and copy your UserData to a new dataset.
Restore
Remove Old AppData
This step is not required but to have a clean installation remove all UserData folder and files that are not user folders.
ls -la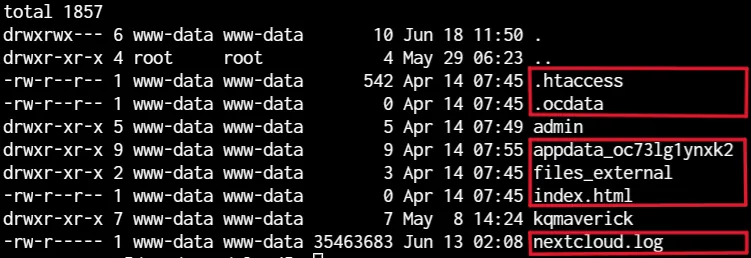
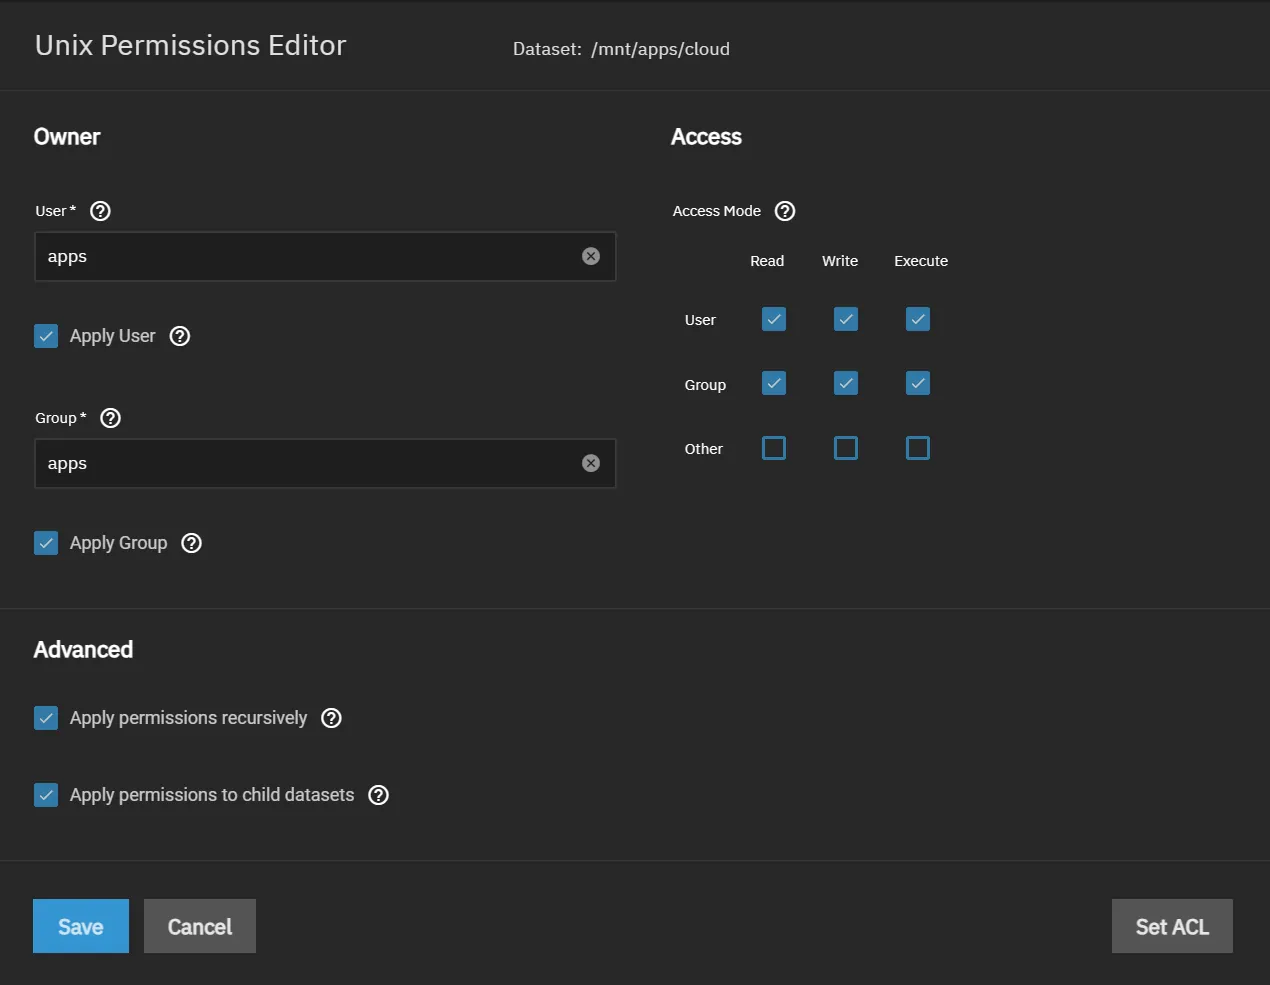
Verify User Data Permissions
Nextcloud uses apps for file ownership. Apply permissions as shown below to your User Data dataset.
Install Nextcloud
Install with a temporary admin user that you do not currently use for Nextcloud (ie. temp)
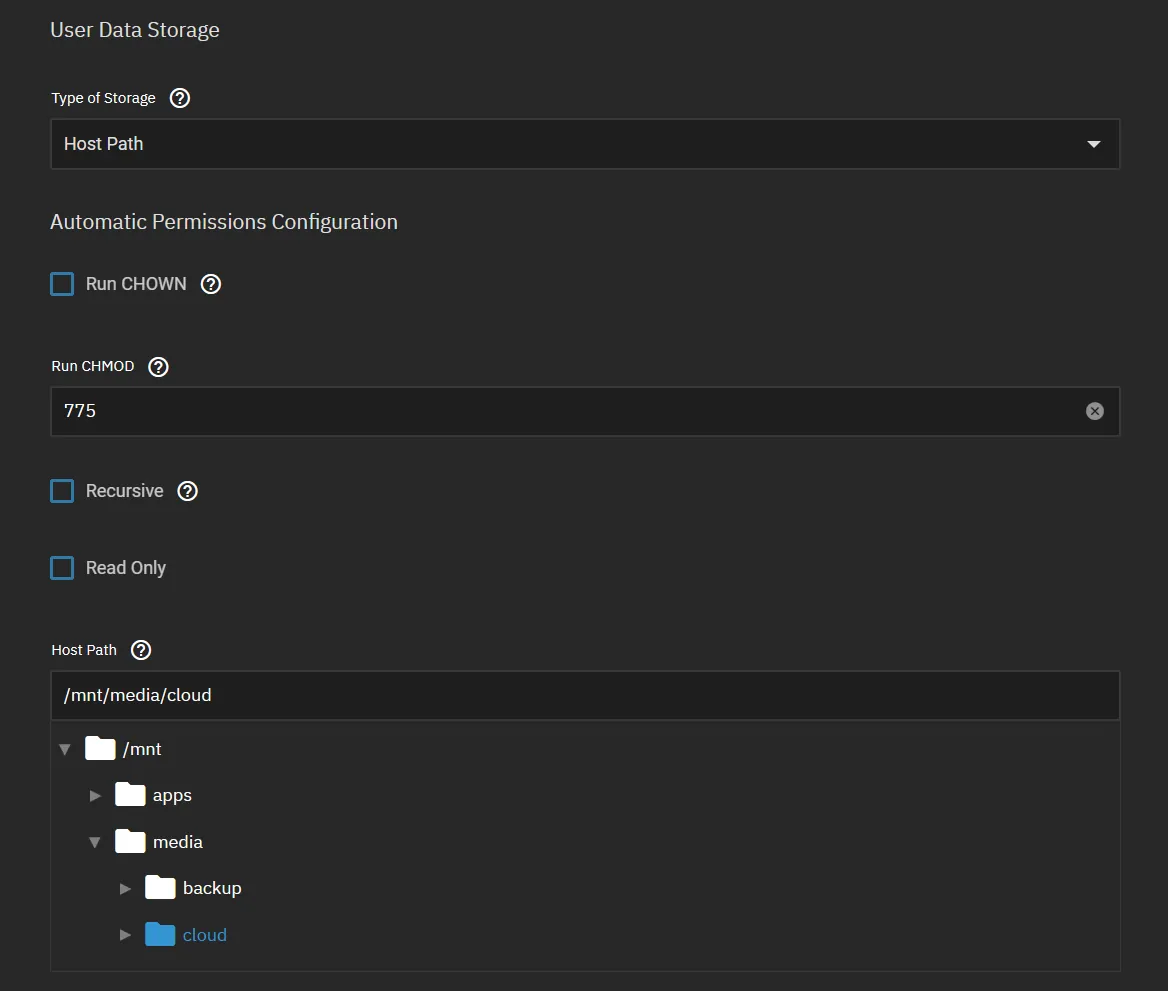
Setup Nextcloud User Data storage with your previous User Data dataset or the dataset you copied your User Data to.
Restore Database
-
Stop the main pod of Nextcloud.
Stop Main Pod of Nextcloud k3s kubectl scale deploy nextcloud -n ix-nextcloud --replicas=0 -
Add Nextcloud to PGAdmin as guided in steps 1 and 2 here.
-
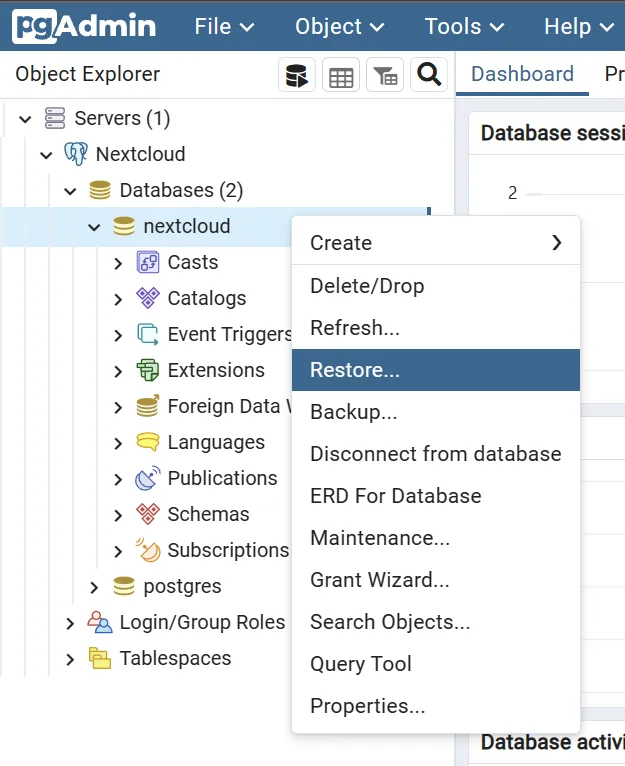
In PGAdmin right click on the database and select restore as shown below.
-
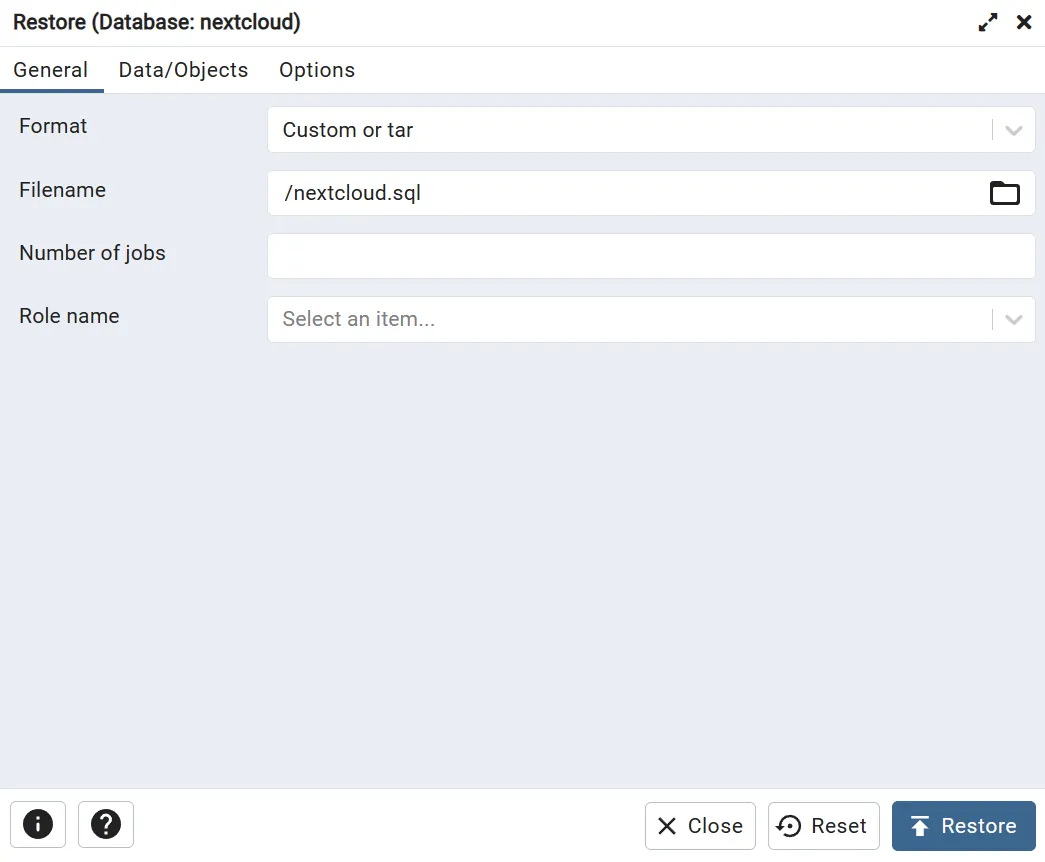
Select the database backup you created previously.
-
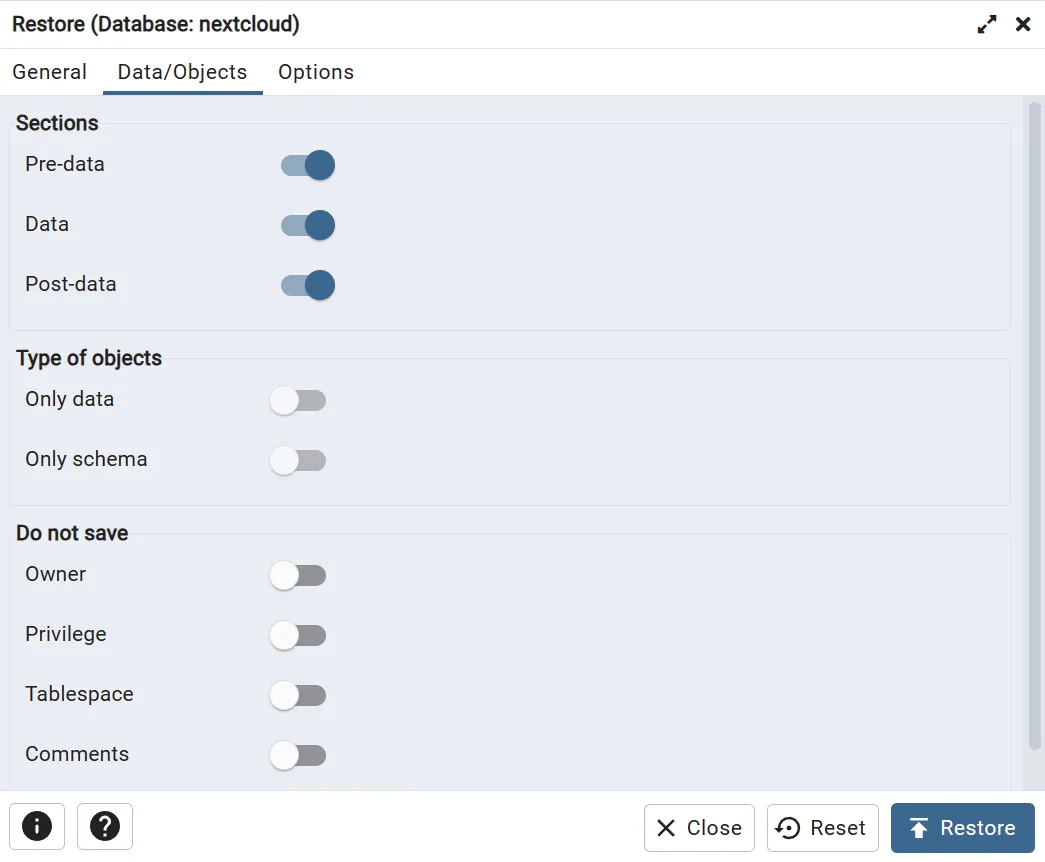
Configure Data/Objects as shown below.
-
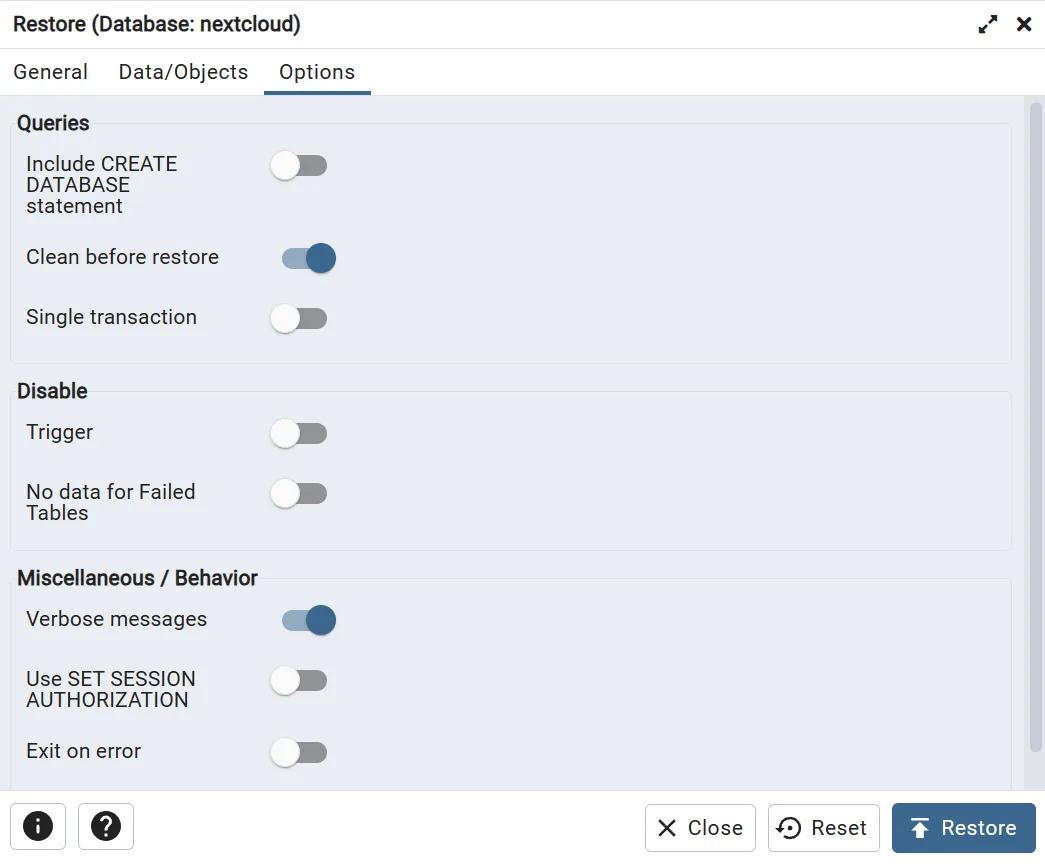
Configure Options as shown below and click restore.
-
Start the main pod of Nextcloud.
Start Main Pod of Nextcloud k3s kubectl scale deploy nextcloud -n ix-nextcloud --replicas=1
OCC Commands
-
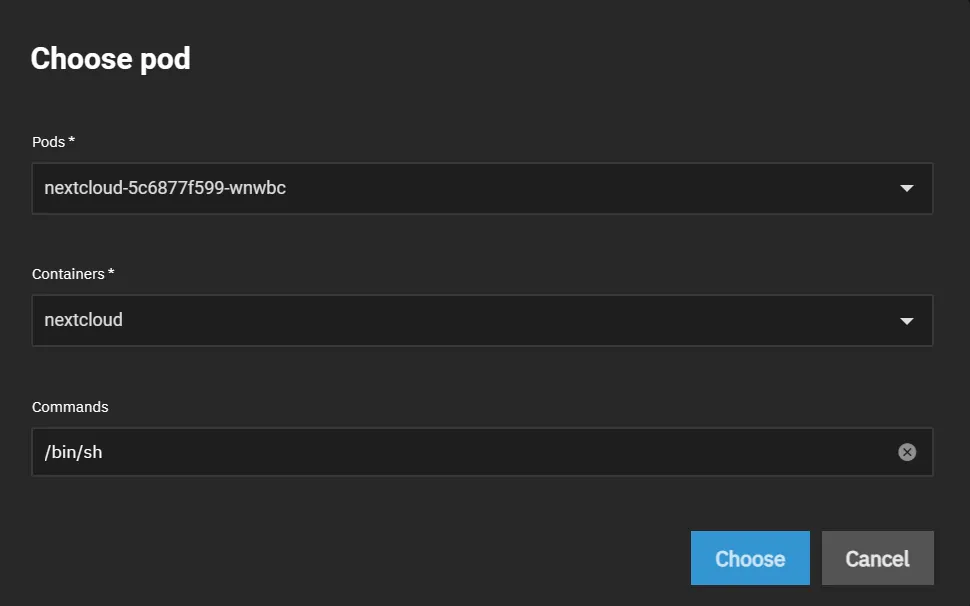
Open a shell for the Nextcloud main pod as shown below. Ensure your are selecting the correct pod it should just say nextcloud for both Pods (followed by random characters only) and Containers as shown below.
-
Run the following commands in the Nextcloud shell.
Run Upgrade occ upgradeTurn On Maintenance Mode occ maintenance:mode --onRun Repair occ maintenance:repairTurn Off Maintenance Mode occ maintenance:mode --offtitle="Add Missing Database Indices occ db:add-missing-indicesScan All User Files occ files:scan --all
Delete Temporary User Data Folder
You may now remove the folder created during install for the temporary user that was configured.