External-DNS Setup Guide
ExternalDNS synchronizes exposed Kubernetes Services and Ingresses with DNS providers.
What it does?
Section titled “What it does?”Inspired by Kubernetes DNS, Kubernetes’ cluster-internal DNS server, ExternalDNS makes Kubernetes resources discoverable via public DNS servers. Like KubeDNS, it retrieves a list of resources (Services, Ingresses, etc.) from the Kubernetes API to determine a desired list of DNS records. Unlike KubeDNS, however, it’s not a DNS server itself, but merely configures other DNS providers accordingly—e.g. AWS Route 53 or Google Cloud DNS.
Prerequisites (required for Support on TrueCharts Discord)
Section titled “Prerequisites (required for Support on TrueCharts Discord)”- Traefik
- Clusterissuer / Cert-manager deployed
Installation instructions
Section titled “Installation instructions”This guide will cover 3 scenarios, Cloudflare, Pi-hole and PowerDNS. For more external DNS record providers, see External-DNS Docs.
PowerDNS
Section titled “PowerDNS”These instructions taken from external-dns powerdns tutorial
Step 1
Section titled “Step 1”Set pdns provider with externaldns.provider: pdns
Step 2
Section titled “Step 2”Set externaldns.pdns.pdnsApiKey and externaldns.pdns.pdnsServerUrl.
The ApiKey must provide Zone Read/Write on all zones covered by domainFilters
The pdnsServerUrl is the full URL of the powerdns api endpoint, including the port (http://pdns-server-api.tld:9191/)
Cloudflare
Section titled “Cloudflare”These instructions taken from external-dns cloudflare tutorial
Step 1
Section titled “Step 1”Set the env. CF_API_TOKEN (preferred) or CF_API_EMAIL/CF_API_KEY.
When using API Token authentication, the token should be granted Zone Read, DNS Edit privileges, and access to All zones.
Step 2
Section titled “Step 2”- Enter preferences for Logs and DNS updates (Suggested >5m to prevent log spam)
- Set
cloudflareas provider - set sources
ingressandserviceshould covers everything. - If you want to filter by multiple domains add your
domainFilters - Recommend using
noopforregistryand leaving the rest as default, - You can add DNS Zone filters
zoneidFiltersas necessary as well
For more details of all option, see upstream docs of external-dns.
externaldns: logLevel: "info" logFormat: "text" interval: "60m" provider: "cloudflare" sources: - "service" - "ingress" domainFilters: - "${BASE_DOMAIN}" zoneidFilters: [] cloudflareProxied: "" registry: "noop" policy: "upsert-only" # would prevent ExternalDNS from deleting any records, omit to enable full synchronizationStep 3
Section titled “Step 3”Verify it works, check the logs for updates to DNS records
time="2025-03-02T17:19:28+01:00" level=info msg="Instantiating new Kubernetes client"time="2025-03-02T17:19:28+01:00" level=info msg="Using inCluster-config based on serviceaccount-token"time="2025-03-02T17:19:28+01:00" level=info msg="Created Kubernetes client https://172.17.0.1:443"time="2025-03-02T17:19:31+01:00" level=info msg="Changing record." action=CREATE record=chart1.domain.tld ttl=1 type=A zone=f8d01e5d4a8927a99d2e2655edcc40fctime="2025-03-02T17:19:32+01:00" level=info msg="Changing record." action=CREATE record=chart2.domain.tld ttl=1 type=A zone=f8d01e5d4a8927a99d2e2655edcc40fctime="2025-03-02T17:19:33+01:00" level=info msg="Changing record." action=CREATE record=chart3.domain.tld ttl=1 type=A zone=f8d01e5d4a8927a99d2e2655edcc40fcIf this works, you’ll see DNS entries inside Cloudflare’s DNS page.
PiHole
Section titled “PiHole”Step 1
Section titled “Step 1”- Set
piholeas provider - set sources
ingressandserviceshould covers everything - Recommend using
noopforregistry - Set PiHole Server Address
piholeServerand PiHole Server PasswordpiholePassword - Set
piholeAPIVersiondepending on which version of PiHole you have installed i.e. 5 or 6
externaldns: logLevel: "info" logFormat: "text" interval: "60m" provider: "pihole" sources: - "service" - "ingress" domainFilters: [] zoneidFilters: [] registry: "noop" policy: "upsert-only" # would prevent ExternalDNS from deleting any records, omit to enable full synchronization piholeServer: "http://pihole.pihole.svc.cluster.local:8089" piholePassword: "DitIsSuperGeheim" piholeAPIVersion: "6"Step 2
Section titled “Step 2”Verify logs from External-DNS to see if it connects and updates PiHole
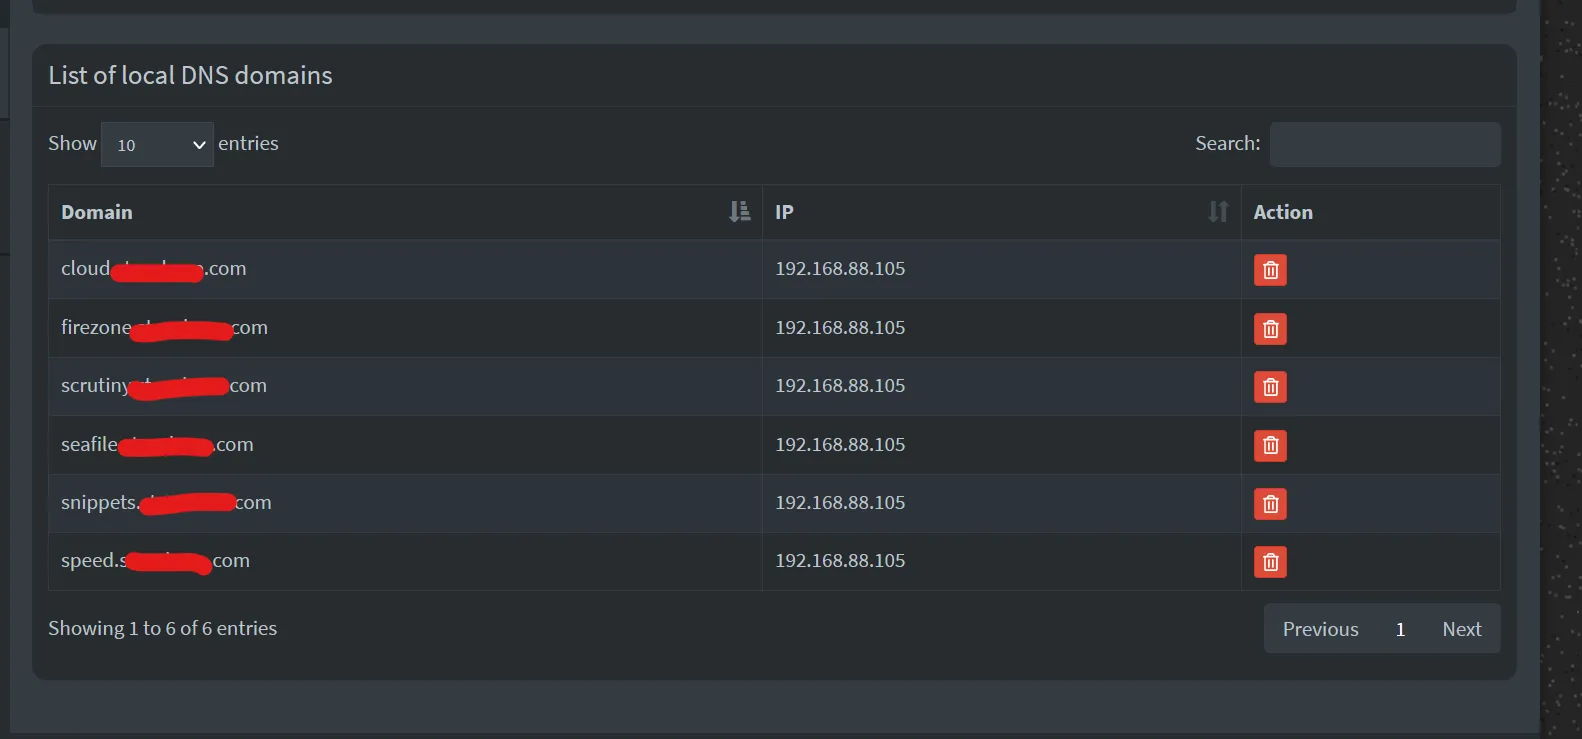
... PiholeServer:http://pihole.ix-pihole.svc.cluster.local:9089 PiholePassword:****** PiholeTLSInsecureSkipVerify:false PluralCluster: PluralProvider:}"2023-11-07 10:29:07.801555-05:00time="2023-11-07T10:29:07-05:00" level=info msg="Instantiating new Kubernetes client"2023-11-07 10:29:07.801568-05:00time="2023-11-07T10:29:07-05:00" level=info msg="Using inCluster-config based on serviceaccount-token"2023-11-07 10:29:07.801861-05:00time="2023-11-07T10:29:07-05:00" level=info msg="Created Kubernetes client https://172.17.0.1:443"2023-11-07 10:29:08.008741-05:00time="2023-11-07T10:29:08-05:00" level=info msg="add firezone.DOMAIN.com IN A -> 192.168.88.105"2023-11-07 10:29:10.048171-05:00time="2023-11-07T10:29:10-05:00" level=info msg="add scrutiny.DOMAIN.com IN A -> 192.168.88.105"Check PiHole GUI for A records under Local DNS