
Talos VM on TrueNAS SCALE
Below are the instructions for creating a Talos VM atop a TrueNAS SCALE host for use with TrueCharts.
Creating a Network Bridge
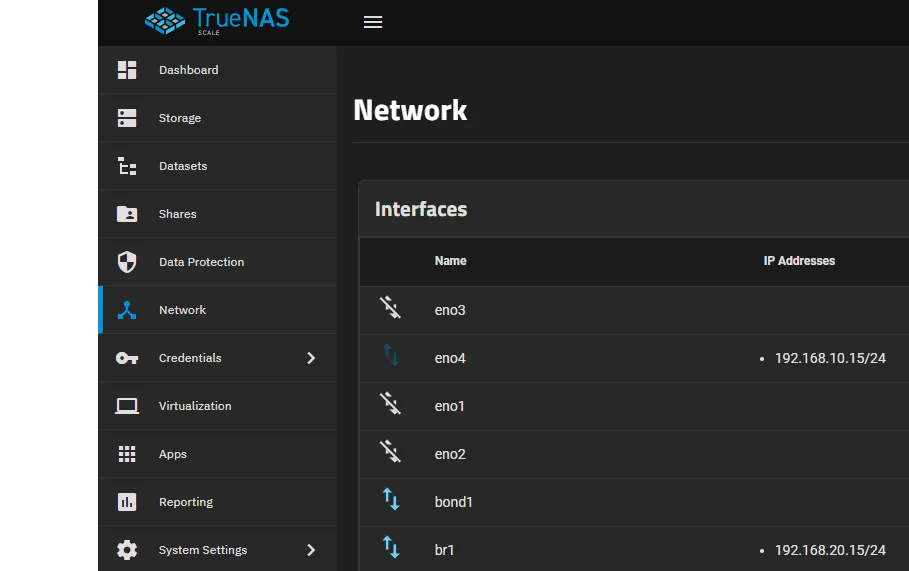
A network bridge will be needed for running a VM inside of SCALE and to be able to reach the SCALE host machine. To create a Bridge network, open your TrueNAS Scale Web UI and go to the Network tab.
Preparation
Acquire Interface Settings
Note down the interface IP Address and the Subnet mask of your currently used interface.
This can be found through the WebUI:
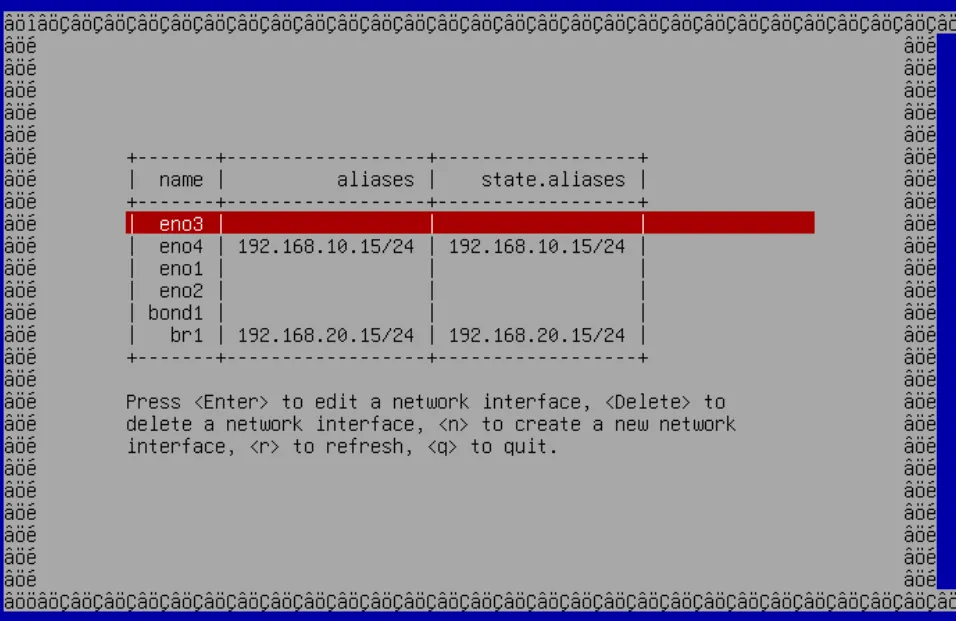
Or through the Console with option “1) Configure network interfaces”:
Make sure the TrueNAS Apps service is not using the IP for the node IP
If the current node IP is the IP address the we retrieved in the previous preparation step you will not be able to remove the IP Address from the interface in the next steps.
To resolve this add an IP address in another subnet to a interface and bind the apps service to that interface temporarily. When you do this the Apps service will crash if normal network behavior is not possible through the IP/interface.
Once done you can reset the settings to the new bridge interface at which point the Apps service will restart.
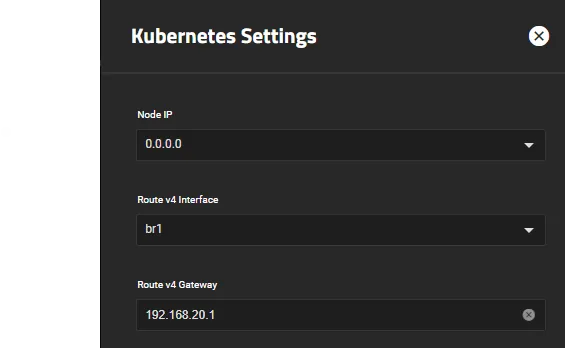
To change this using the TrueNAS web UI go to “Apps” -> “Settings” -> “Advanced Settings”.
Change:
-
Node IP to the temporary IP (and back once done)
-
Route v4 Interface to the interface that IP is on (and back once done)
-
Route v4 Gateway to a address in the subnet for the temporary IP (and back once done)
Removing the Alias from the main interface
-
Click on
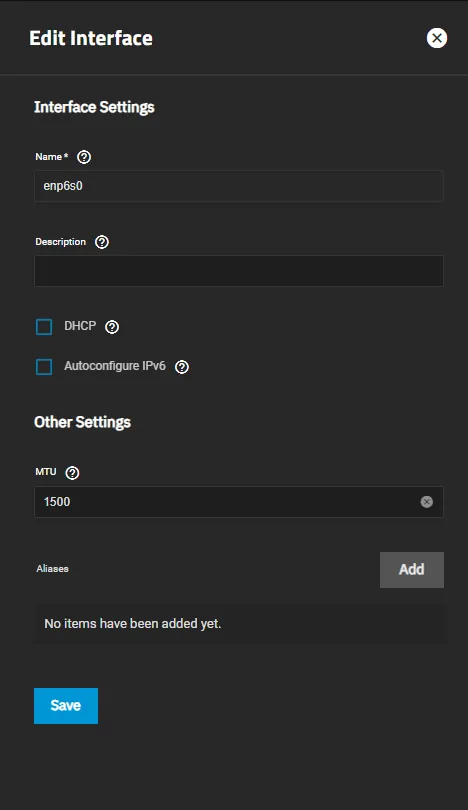
Editon the currently used interface -
Disable “DHCP” and remove all “Aliases” by clicking on the x next to them
The Network Interface should then look like this:
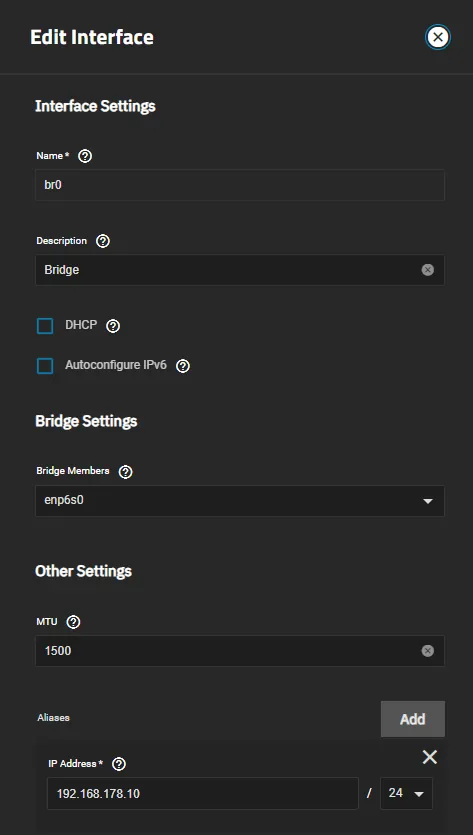
Creating the Network Bridge
-
Click on
Addin the top-right corner of the interfaces section -
Select the type
Bridgeand give it a Name. Note that this name cannot be changed afterwards, so you might want to add a meaningful description to it -
Add your network interface as a Bridge Member. (In this example: enp6so)
-
Set the
MTUto “1500” -
In the Alias section, click on
Addto create a new IP address field -
Enter the IP address and Subnet mask you previously took note of
-
Click
Test Changesand confirm the prompt. Wait a bit for the UI to become responsive again
-
Click on
Save Changesto save the changes you have made -
If something goes wrong and the UI stays unresponsive, the changes will be reverted after 60 seconds.
The bridge should now look similar to this one when done:
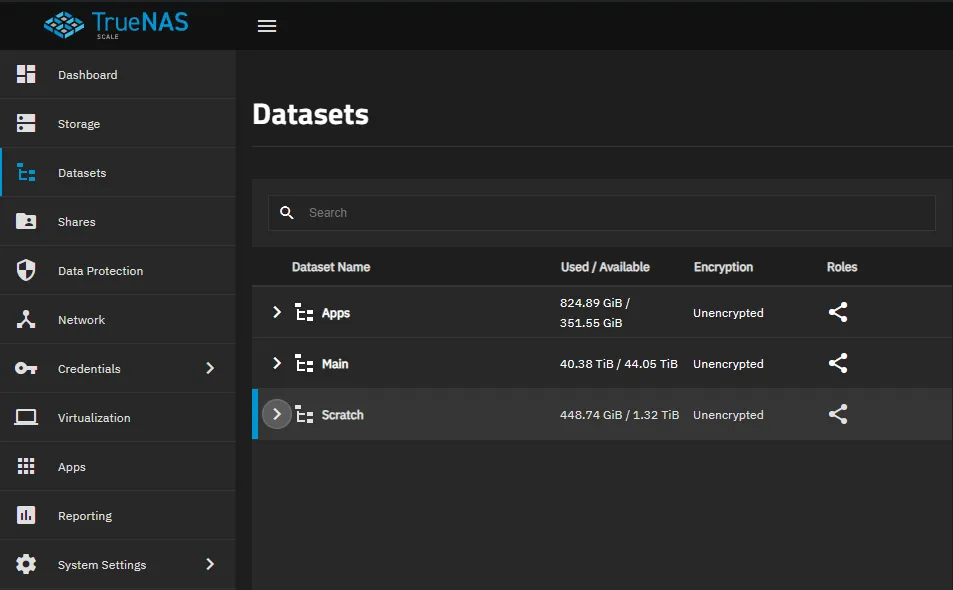
Creating ZVOL storage for the VM
-
Start by going to the
Datasetssection of your TrueNAS Scale WebUI -
Select the dataset you want the files for the VM to be stored on, as below
-
Click the
Add Zvolbutton on the top-right -
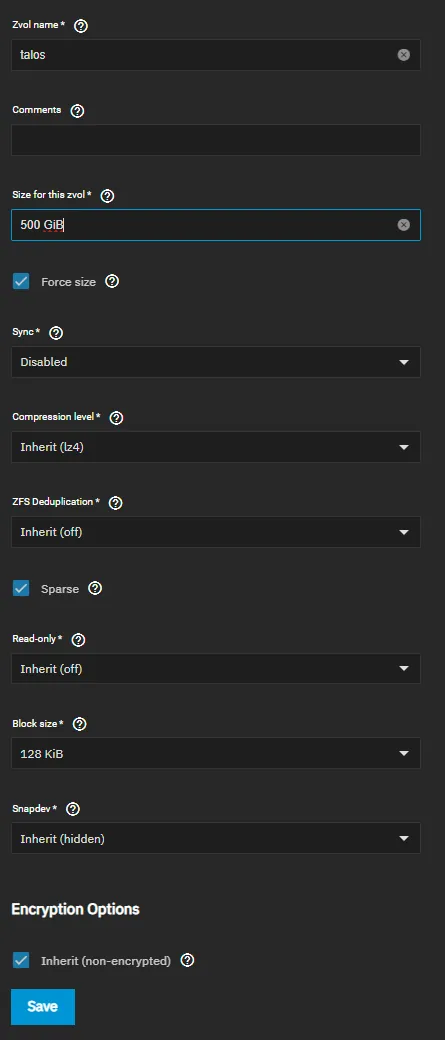
You will be presented with a pane of potential options. Leave all of these as default except for
Zvol name(call it something recognizable likeTalos zvol),Size for this zvol(set to between256GiBand512GiB),Force size(check this option),Sparse(check this option) andBlock size(change to128 KiB) -
Set
Syncto disabled. -
We do not recommend to encrypt the dataset
-
After you are done it should look similar to this:
-
Hit
saveand wait for the system to create the Zvol. The GUI should refresh and then show your Zvol in the list of datasets like so
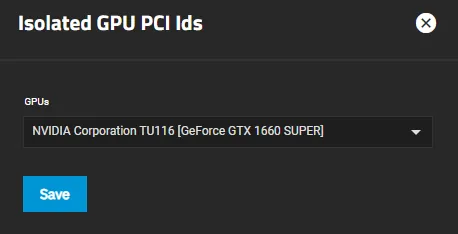
GPU Isolation
Skip this step if you do not intend to pass a GPU through to the Talos VM.
-
Go to
System Settings>Advancedin your SCALE UI and scroll down to the sectionIsolated GPU Device(s) -
Click on
Configureon the top right of the section and close the warning -
Select the GPU you want to Isolate and use for your VM in the dropdown. Like shown here
-
Click
Save. This might take a bit -
It should now show your isolated GPU in the section. You may need to hard-refresh your browser’s page with CTRL + F5 for it to update due to SCALE GUI issues.
Creating the VM
-
Start by going to the
Virtualizationsection of your TrueNAS Scale WebUI -
If you want to assign a GPU to the VM, make sure to isolate the GPU first
-
Click on
Add Virtual Machines -
We also highly suggest users to set a fixed DHCP-Lease (aka static IP) for your VM inside your modem/router.
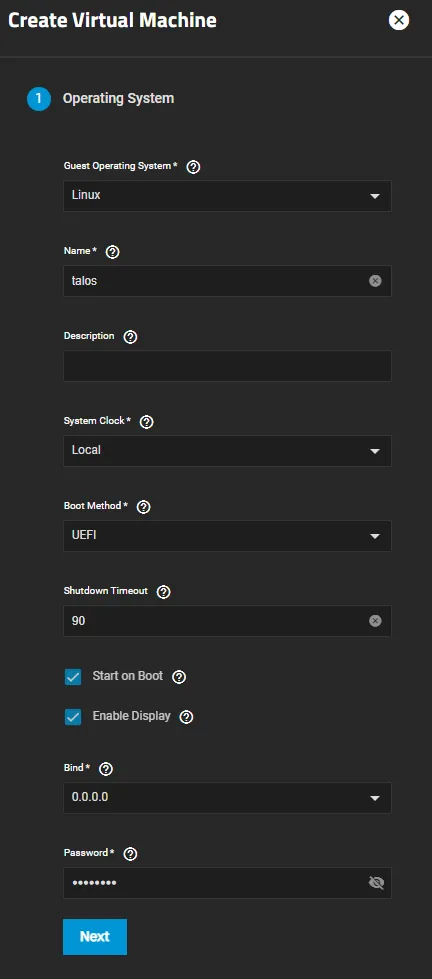
Operating System
Select the options like shown below. Make sure to remember the password you have set!
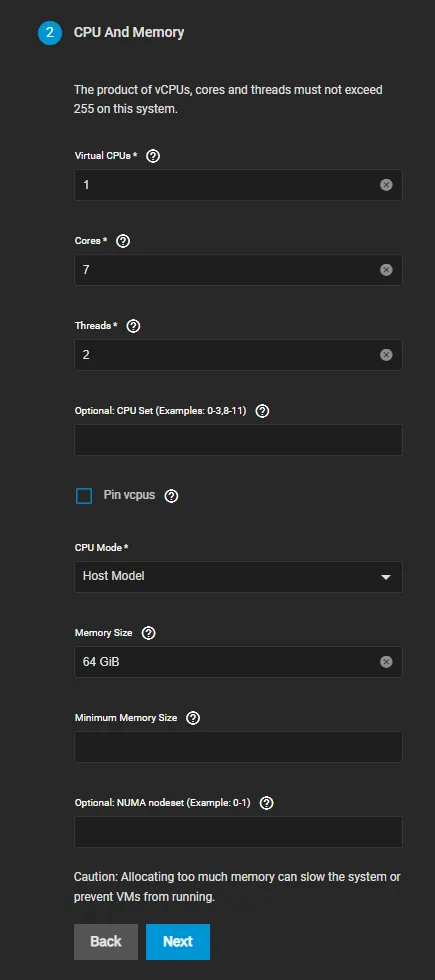
CPU and Memory
-
Select the amount of
Coresand set theThreadsto2if your CPU supports HyperThreading like in the example below. We suggest you to add available host system cores minus 1 for your host system -
Make sure to allocate enough
RAMtowards your VM with theMemory Sizesetting.
Minimum amount of RAM: 16GB
Minimum recommended amount of RAM: 32GB
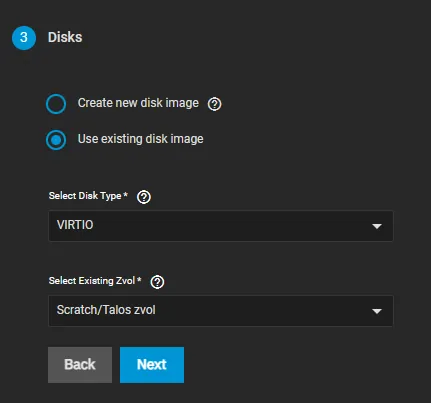
Disk
Select the previously created Zvol for your VM as shown below:
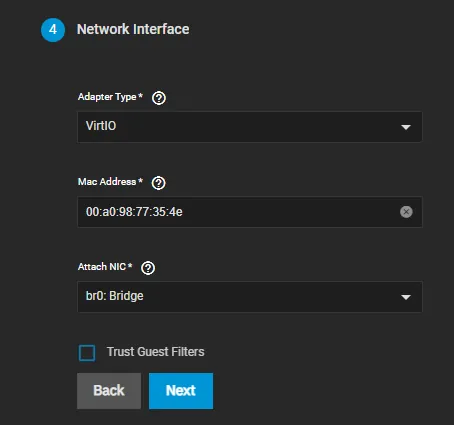
Network Interfaces
Change the Attach NIC to the Bridge you created in the beginning of the guide
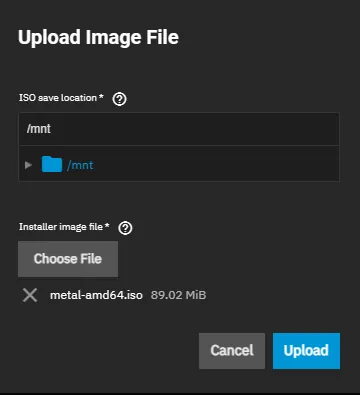
Installation Media
-
Download the Talos Linux image here and save it to your PC
-
Click on
Upload New Image Filein the VM Creation Screen and chooseChoose Fileand select the downloaded ISO. Make sure to select a location on your SCALE host where you want to save your ISO to. An example can be seen below:

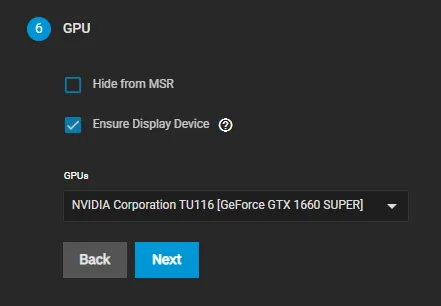
GPU
Make sure your GPU is isolated before you try to assign it to your VM. If you don’t want to assign a GPU to your VM, just click Next and skip this part of the guide.
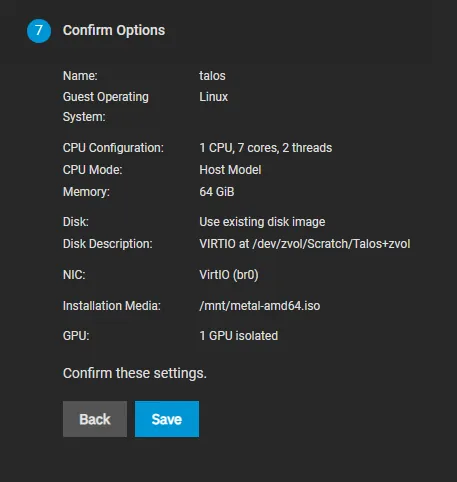
Confirm Options
If you followed this guide correctly, the options shown should look similar to the screenshot below. Make sure everything is correct and then click on Save to finish the VM setup.
Fixed DHCP Lease
Below you can find 2 examples on how to set a fixed DHCP Lease for UniFi and Fritzbox hardware.
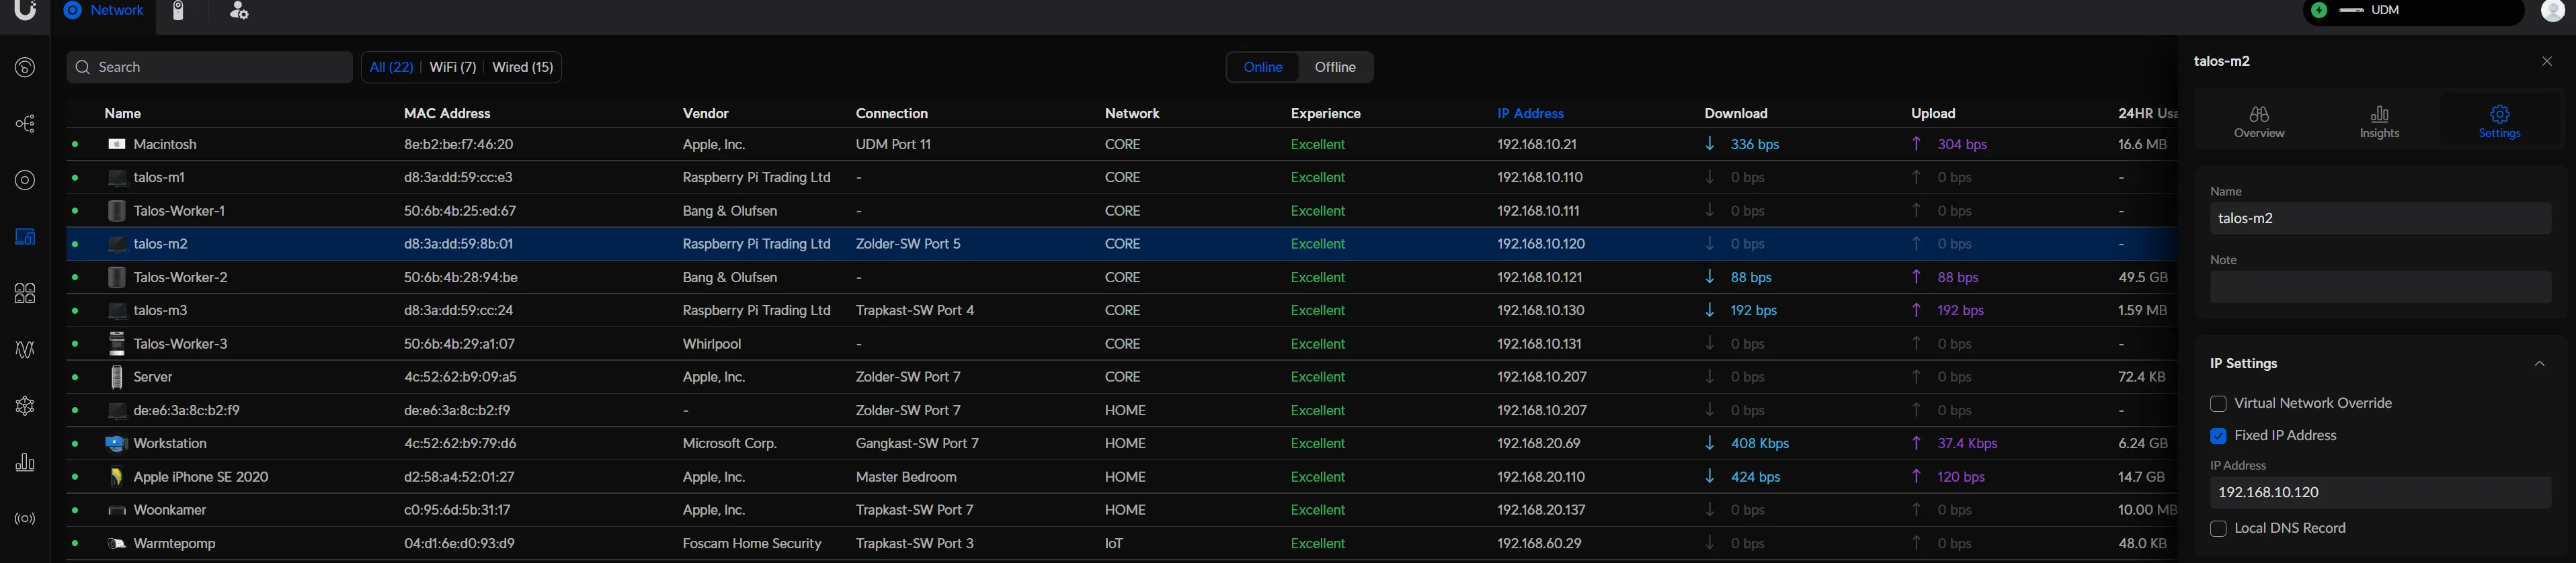
UniFi
-
Open your UniFi UI and go to the Client View (highlighted in blue on the screenshot)
-
Click on the Client that represents your VM (not your SCALE Host System)
-
Select
Fixed IP-Addressin the pop-up menu on the right, enter the IP address you’d like to reserve for the VM, and hitApply Changes. Note that you will need to restart the VM from within SCALE to get it to update its IP address if you changed it.
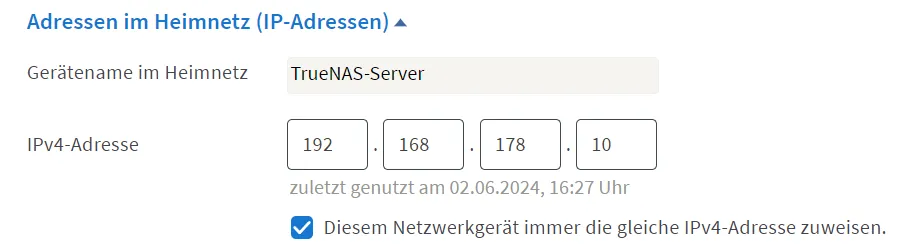
FritzBox
-
Go to your FritzBox web-interface. Navigate to
Home Network>Networkand select the running VM (not your SCALE Host System) -
Click on the
Editbutton and scroll down to the IP-Address in Home Network section -
Check
Always give this device the same IP.
Post-Installation steps
To make sure your Talos cluster starts correctly after restarting the VM, don’t forget to remove the Installation Media ISO after you initialized the cluster.
You can do this by going to Virtualization > Expand your VM > Devices and then delete the “CD Rom”-device.
GPU pass-through Caveats
Users running the Talos VM atop a TrueNAS SCALE host system that want to also take advantage of GPU passthrough to the VM will require a minimum of 2 different GPUs to be present in the system.
The GPU desired to be passed through to the Talos VM will need to be isolated within SCALE.
This could include any of the following combinations:
GPU1: Dedicated Nvidia GPU isolated within SCALE for VM passthrough
GPU2: Intel/AMD iGPU
or
GPU1: Motherboard IPMI GPU
GPU2: Intel iGPU or dedicated Nvidia GPU isolated within SCALE for VM passthrough
Single GPU pass-through (Advanced)
- Modify the Python file
/usr/lib/python3/dist-packages/middlewared/plugins/system_advanced/gpu.py
if len(available - provided) < 1: verrors.add( f'{schema}.isolated_gpu_pci_ids', 'A minimum of 1 GPU is required for the host to ensure it functions as desired.' )Comment Out this section (# in front of every line)
-
Delete the whole folder
/usr/lib/python3/dist-packages/middlewared/plugins/system_advanced/__pycache__ -
Reboot Server or atleast middleware
-
Go to system> advanced and isolate the gpu. (Button will be greyed out and will show the red error thats totally fine)
-
Open he Inspect window of your browser and find the button which is greyed out. Should look like this:
<button mat-button="" type="submit" color="primary" ixtest="save" mat-ripple-loader-uninitialized="" mat-ripple-loader-class-name="mat-mdc-button-ripple" class="mdc-button mat-mdc-button mat-primary mat-mdc-button-disabled mat-mdc-button-base ng-star-inserted" mat-ripple-loader-disabled="" disabled="true" data-test="button-save"> -
Remove
"disabled="true"andmat-mdc-button-disabled -
The error will still be there but you should be able to click the button
Might need to do the same Steps 5 and 6 when assigning the gpu to the VM.