How-To
This is a quick how-to or setup guide to use Authentik and setup a simple Proxy Provider with traefik using the Embedded Outpost to use as a Traefik forwardauth.
This guide is created with Authentik 2025.2.1.
Prerequisites
Section titled “Prerequisites”This guide assumes you’re using Traefik as your Reverse Proxy / Ingress provider. Please ensure that you can access your domain properly with Ingress before attempting any further steps.
Authentik Chart Setup
Section titled “Authentik Chart Setup”Chart Values
Section titled “Chart Values”All of the defaults are fine to start off, only the .Values you need to set are password and the ingress settings.
ingress:  main:    enabled: true    hosts:      - host: auth.domain.com      - host: "*.domain.com"        paths:          - path: /outpost.goauthentik.io            pathType: Prefix    integrations:      traefik:        enabled: true      certManager:        enabled: true        certificateIssuer: domain-0-le-prod
authentik:  credentials:    email: info@domain.com    password: secretpassword
Authentik GUI Setup
Section titled “Authentik GUI Setup”- Browse to
https://auth.domain.com
Default username is akadmin and password is whatever you entered in the chart .Values.
- Once logged in enter the Admin Interface
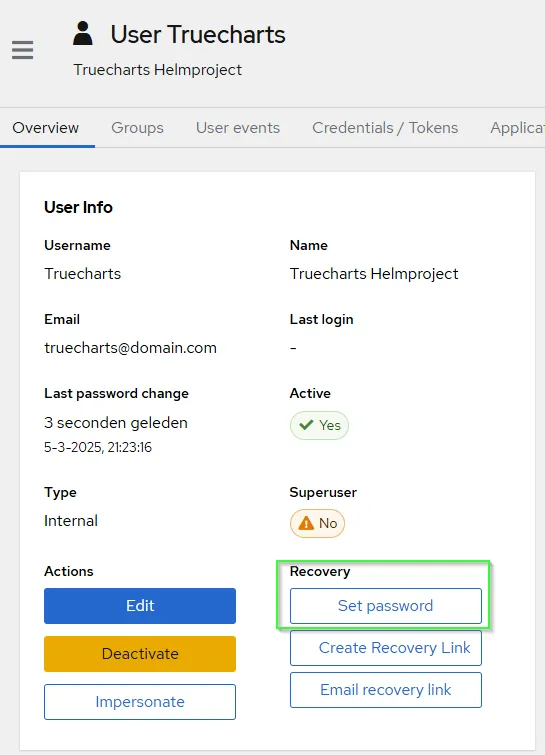
Create an User
Section titled “Create an User”- Create an user or more
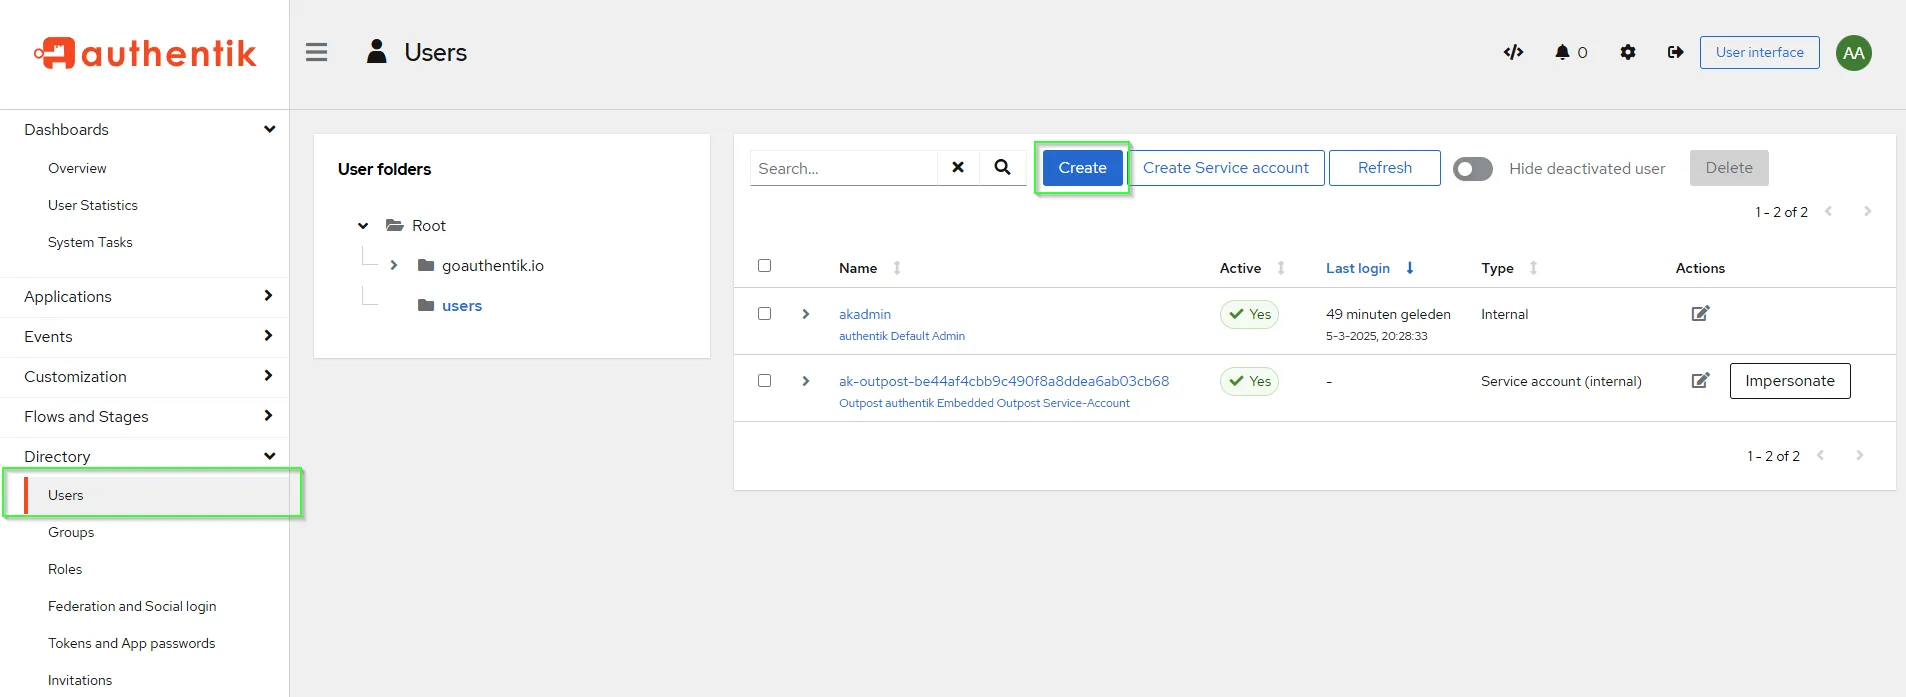
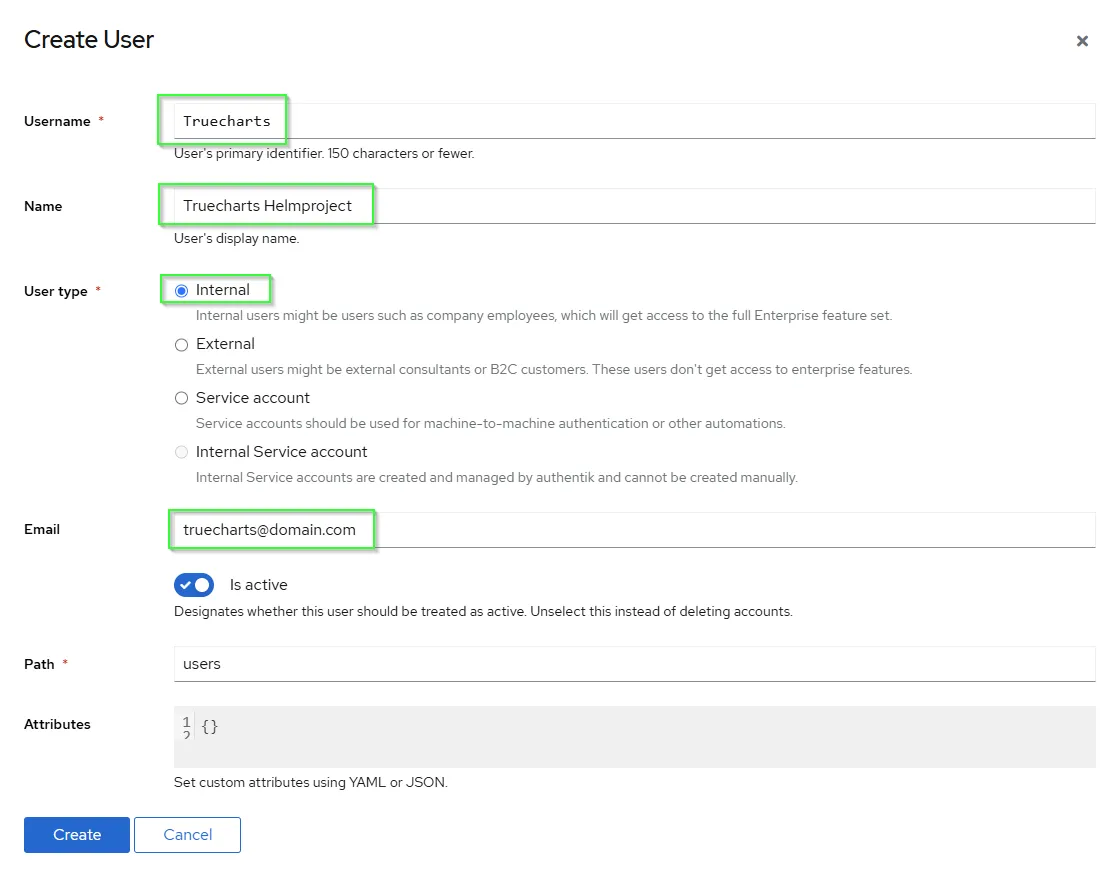
- Set the users password
Create Application based upon subdomain-level access control Forward auth (single application)
Section titled “Create Application based upon subdomain-level access control Forward auth (single application)”If you want to use subdomain-level access control, you have to make per subdomain a Provider and an Application.
The example uses https://sonarr.domain.com/, make sure your app is reachable and uses a valid certificate beforehand.
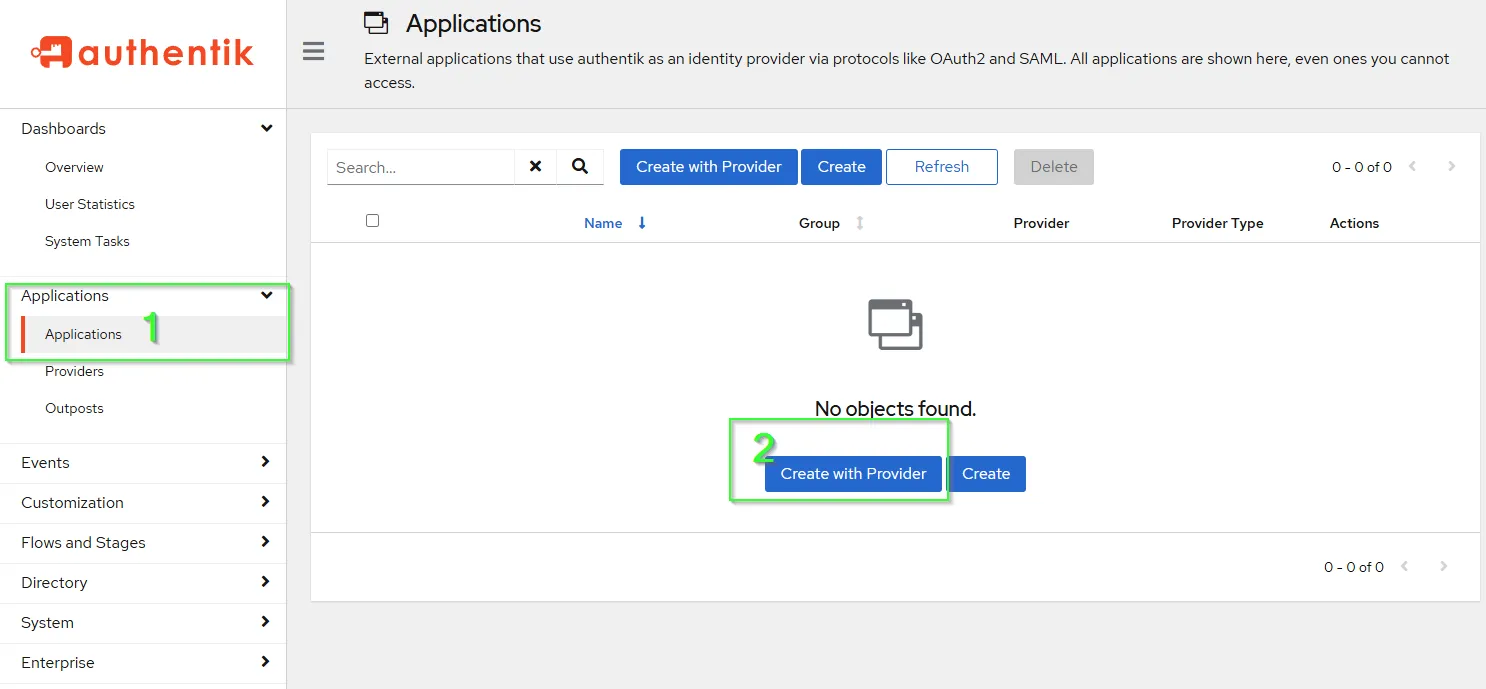
- First step is to create an Application for use with
authentik.
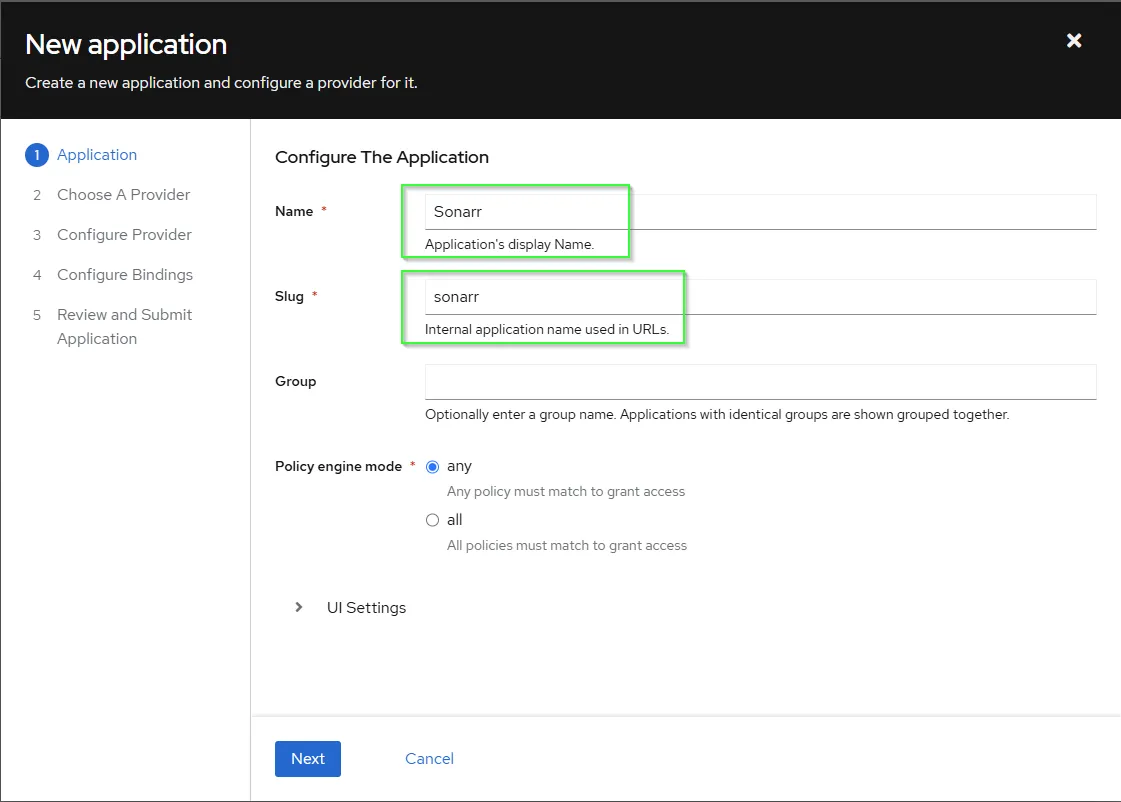
- Specific the
NameandSlugand pressNext.
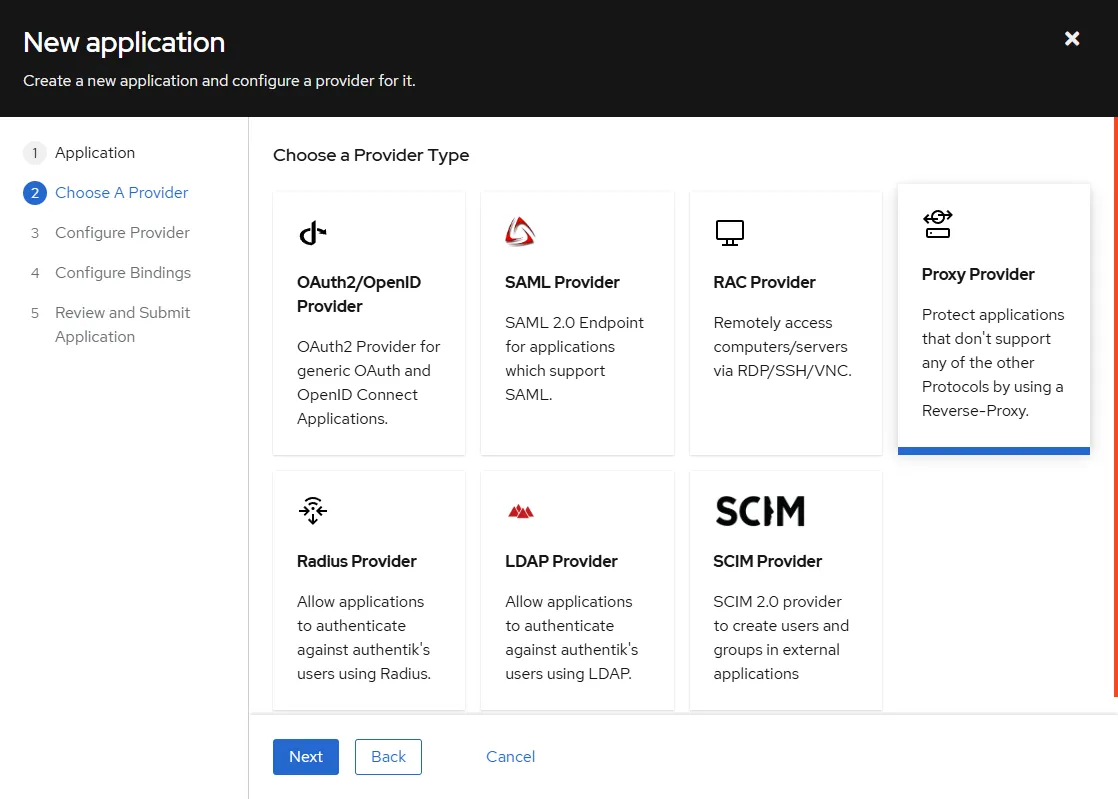
- Choose a Provider
Proxy Providerand pressNext.
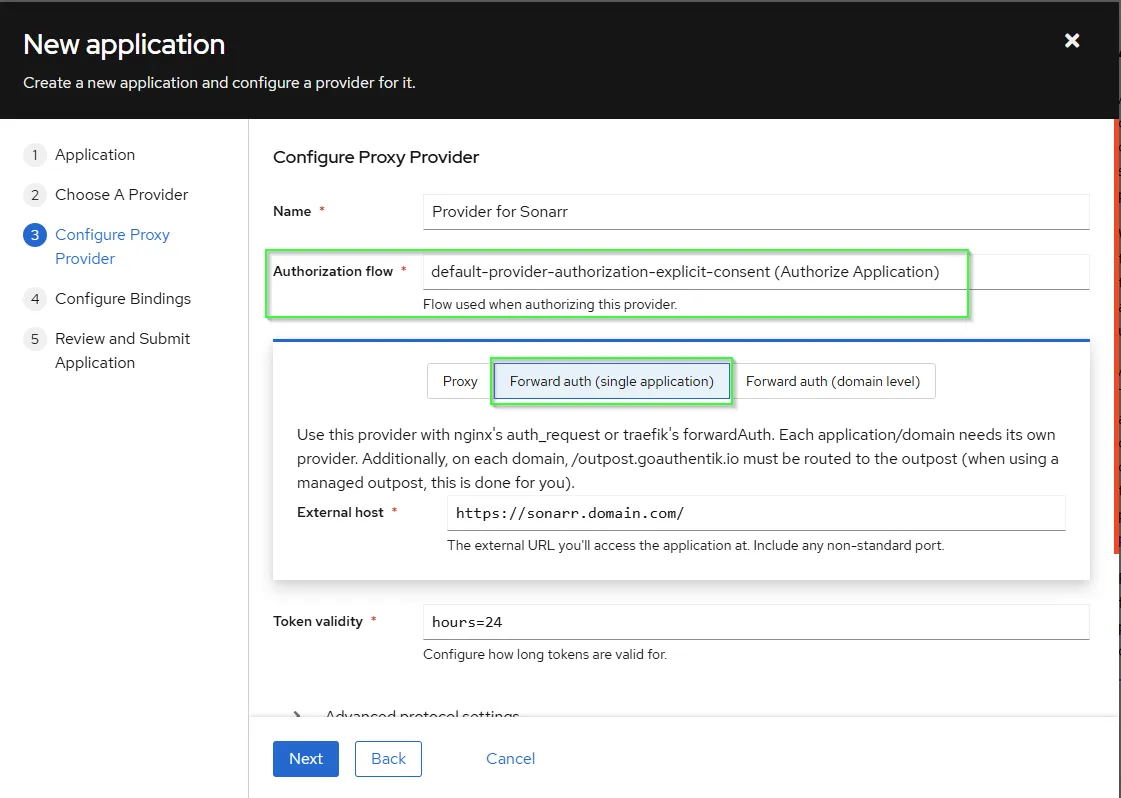
- Configure Proxy Provider by select
Forward auth (single application)and fill yourExternal host. - Select the preffered
Authorization flow - When you scroll down you can enable
Send HTTP-Basic AuthenticationunderAuthentication settingsand complete the correct keys for your service here. Don’t use abasicAuthmiddleware in the apps’ ingress settings. Only use this if your app has build in basic auth support. More information upstream here. In this how_to we don’t use this. - press
Next
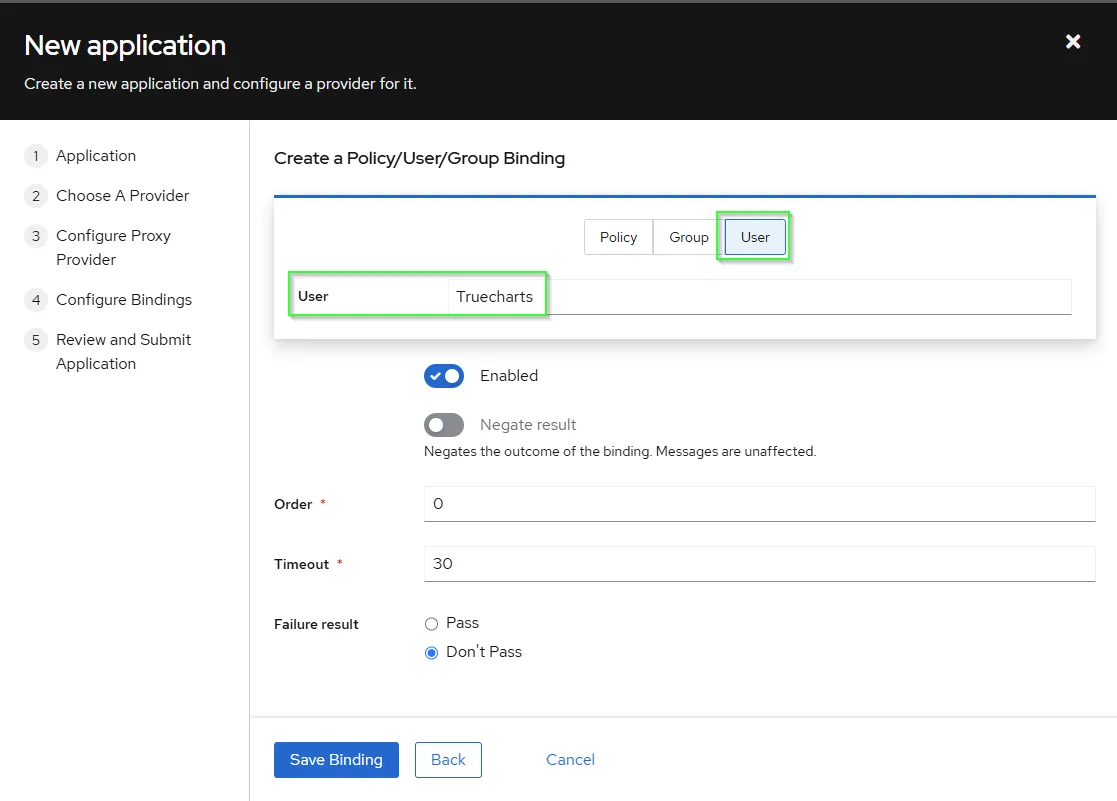
- Choose
Bind existing policy/group/userto assign an user(s), which are allowed to access. If you assign nothing all users are allowed to access. Press Save Binding
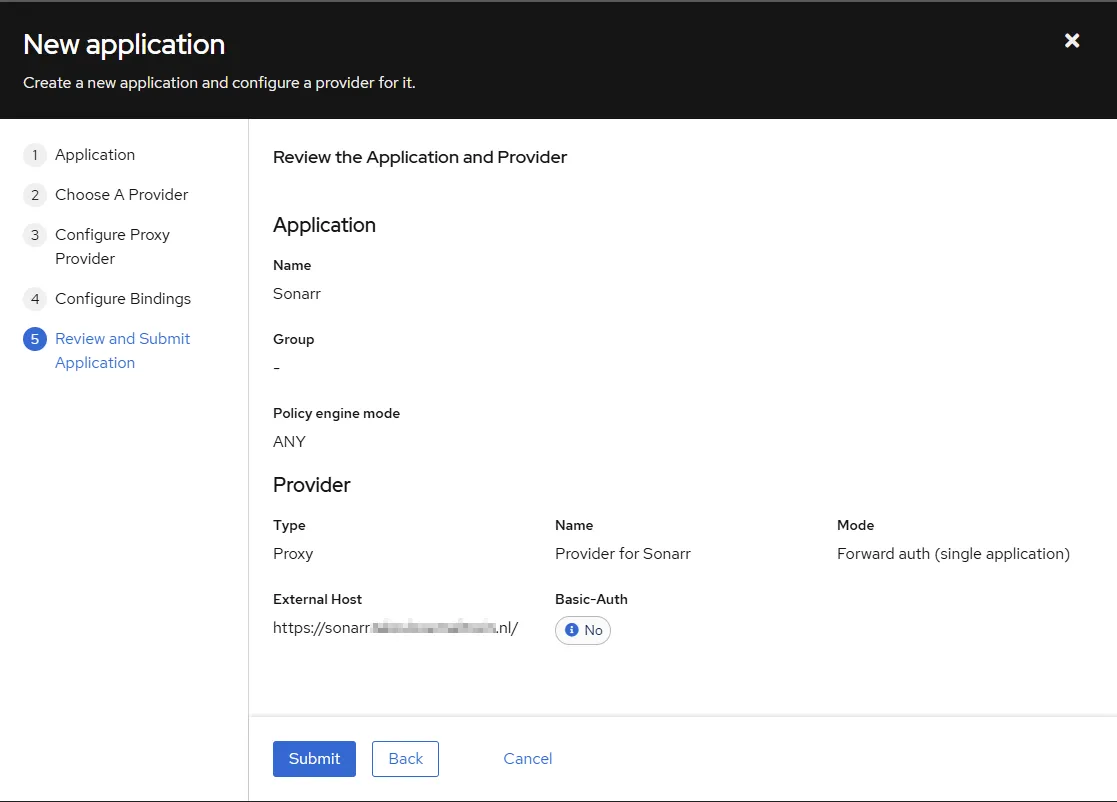
- Review the Application and submit.
Create Application based upon domain access control Forward auth (domain level)
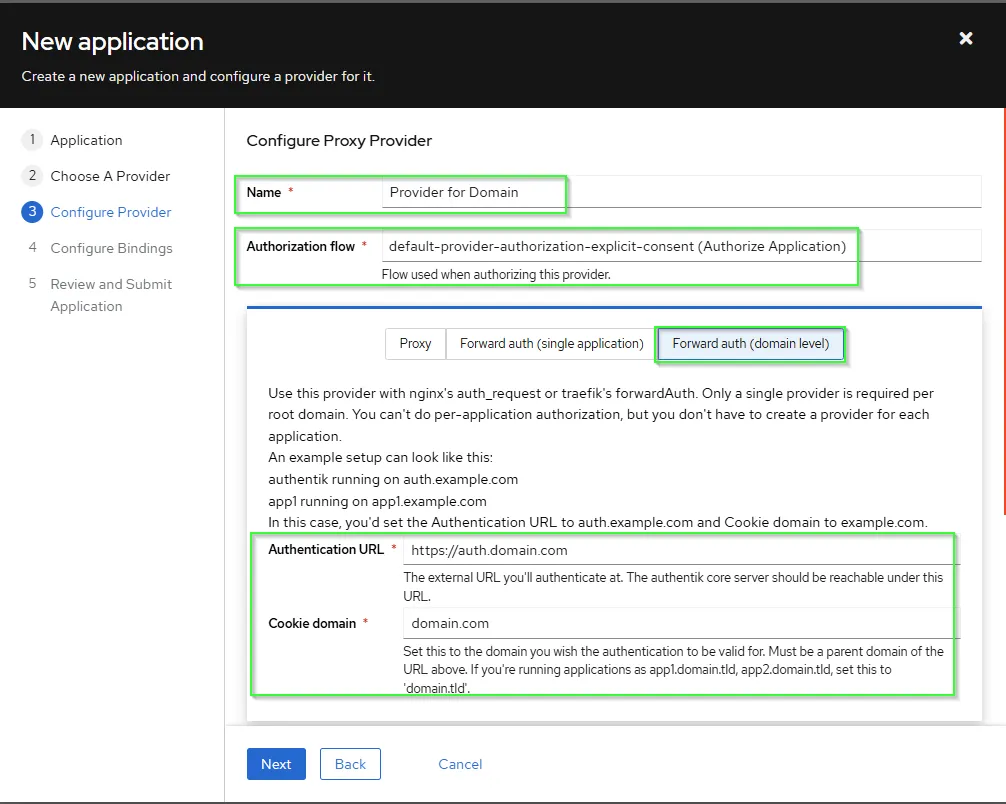
Section titled “Create Application based upon domain access control Forward auth (domain level)”- If you want no controll per sub domain. You can choose at step 4 above
Forward auth (domain level). - Once there you enter the
main ingressURL you use to accessauthentikand thecookie domainas the main domain you use. - Call it for example as Application name
Alland as provider nameProvider Domain.
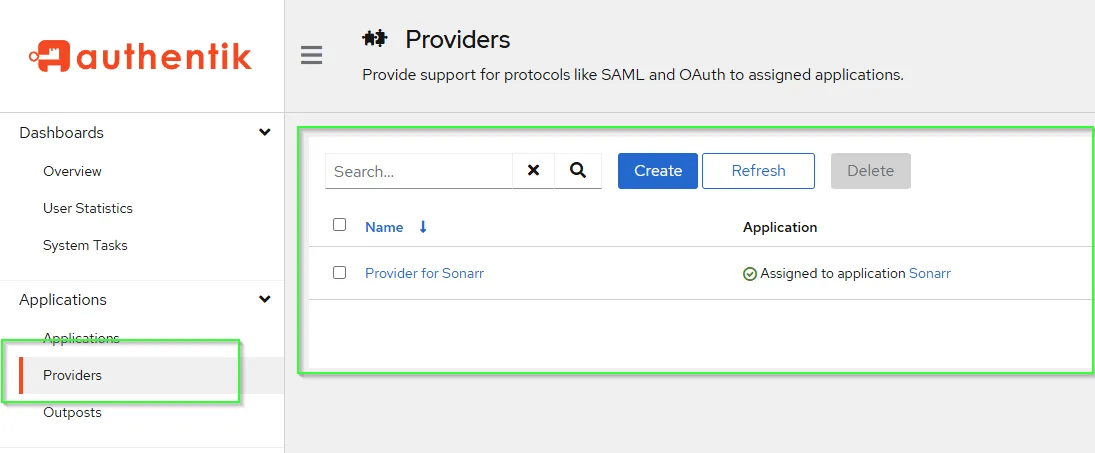
Review Provider
Section titled “Review Provider”If everything was done properly above, you should have the Provider you created assigned to your Application
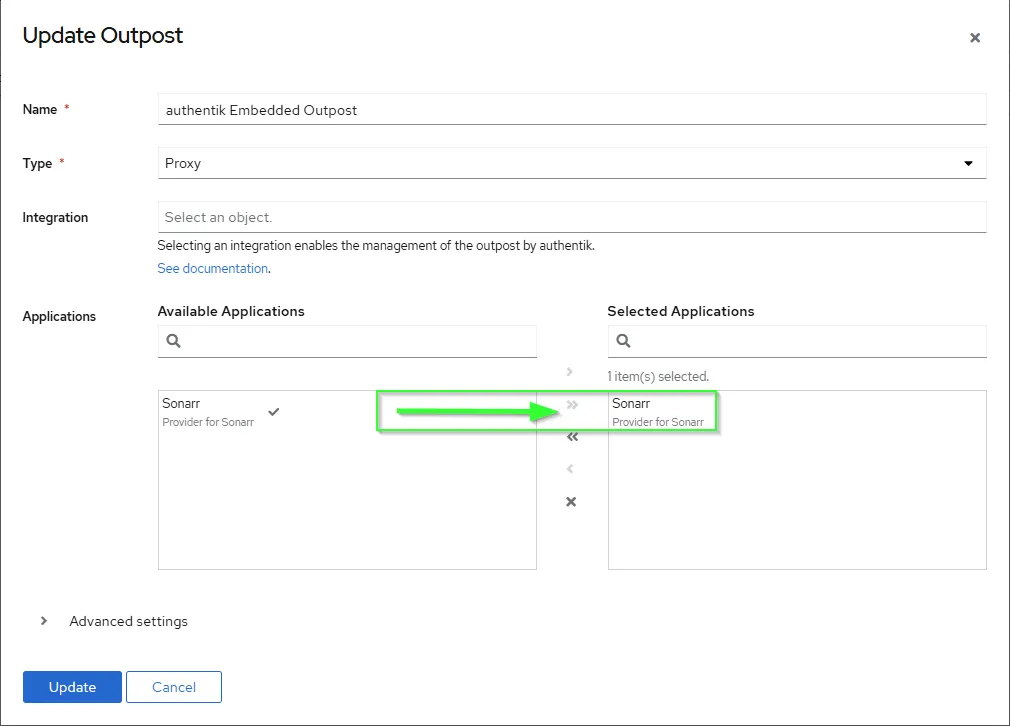
Set Embedded Outpost
Section titled “Set Embedded Outpost”- Go to
Outpostsand check directly the healthcheck.
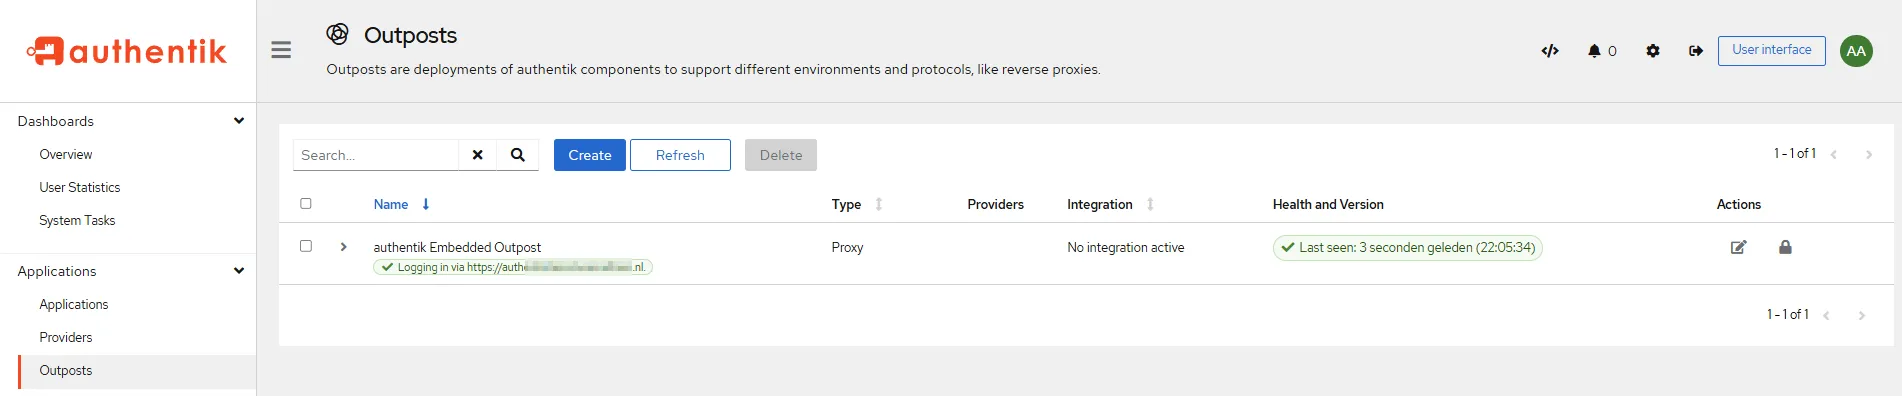
- Next step is simply attaching your
applicationwith theauthentik Embedded Outpostthat has been created automatically. Click theEditbutton under Actions
Traefik ForwardAuth Setup
Section titled “Traefik ForwardAuth Setup”Once authentik is setup and running, you must create a forwardAuth inside Traefik in order to use authentication with Traefik. For my purposes auth is what I used but as long as you remember it you’re fine.
middlewares:  forwardAuth:    - name: auth      address: http://authentik-http.authentik.svc.cluster.local:10230/outpost.goauthentik.io/auth/traefik      authResponseHeaders:        - X-authentik-username        - X-authentik-groups        - X-authentik-email        - X-authentik-name        # - authorization      # According to previous how_to to pass the HTTP-Basic headers from `authentik` to you application  (NOT TESTED)      trustForwardHeader: true
## Other Available authResponseHeaders according upstream documentation: https://docs.goauthentik.io/docs/add-secure-apps/providers/proxy/server_traefik# - X-authentik-entitlements# - X-authentik-uid# - X-authentik-jwt# - X-authentik-meta-jwks# - X-authentik-meta-outpost# - X-authentik-meta-provider# - X-authentik-meta-app# - X-authentik-meta-version
Add Traefik forwardAuth to Charts
Section titled “Add Traefik forwardAuth to Charts”- Once that is done all you need to add the
middlewareto your Charts under theIngress section, as in my case it’s calledauth.
ingress: main: enabled: true integrations: traefik: enabled: true middlewares: - name: auth namespace: traefikVerification it works
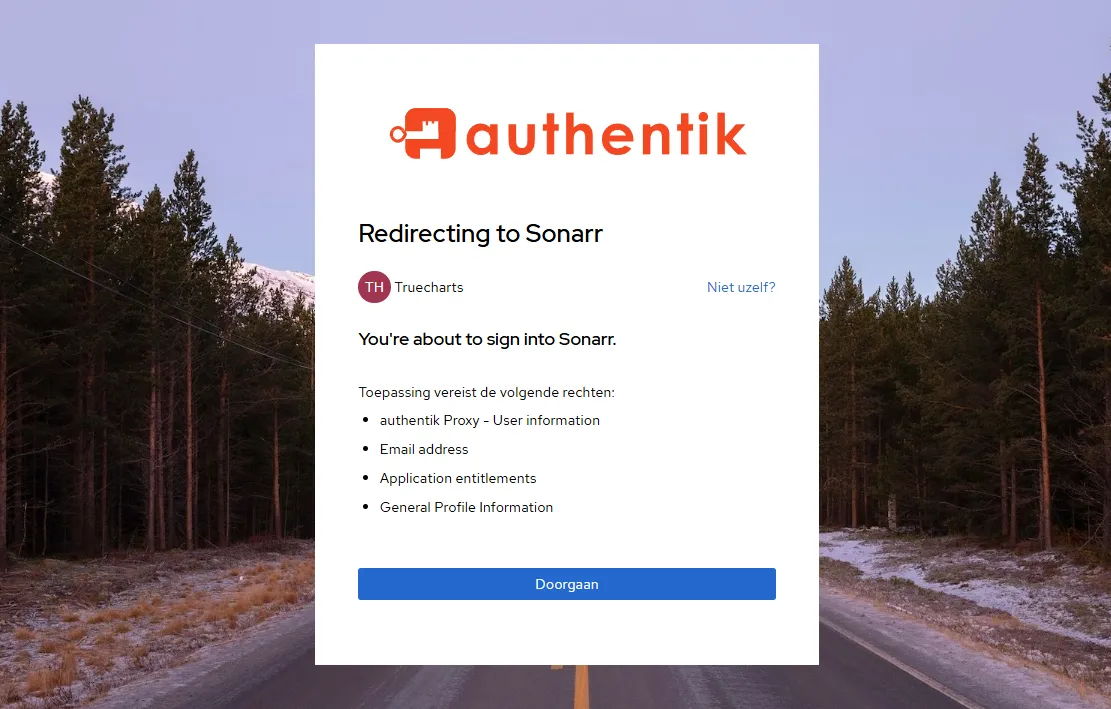
Section titled “Verification it works”- Simply visit any
URLthat you haveTraefik+ theforwardAuthmiddleware enabled
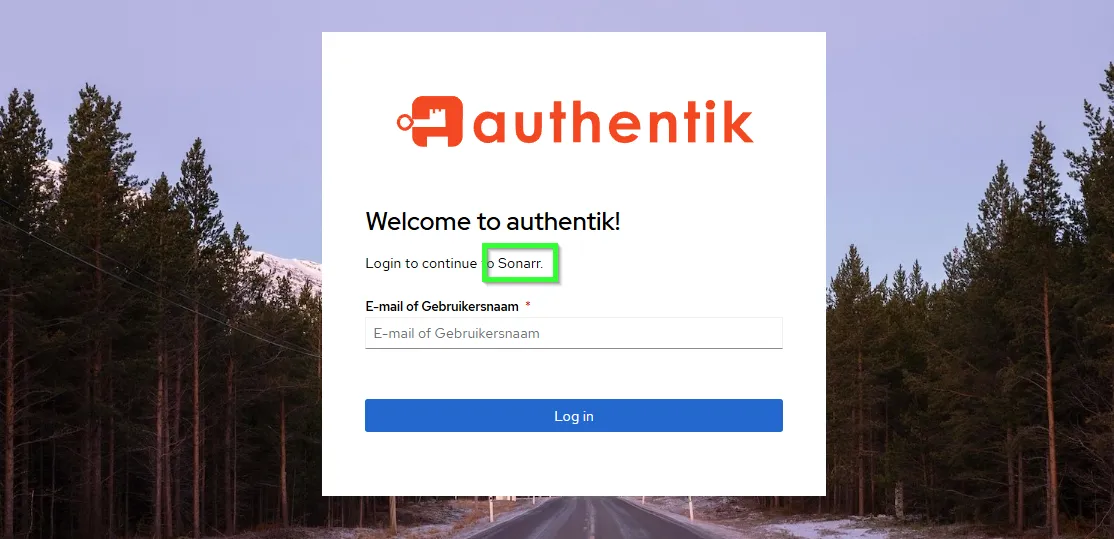
- Login and voila!
Support
Section titled “Support”- You can also reach us using Discord for real-time feedback and support
- If you found a bug in our chart, open a Github issue but generally it’s advised to contact us on Discord first in most cases.
All Rights Reserved - The TrueCharts Project