
Introduction to TrueNAS SCALE
IMPORTANT: Must Read!
All guides under this section are made for TrueNAS SCALE. We do NOT control anything made by iX-Systems, no matter how great or shitty it is. More specifically, we have no control AT ALL over the following:
- Adding/Creating certificates
- Backup functions
- Restore functions
- Rollback functions
- Opening the Shell
- All GUI elements except: Install-menu, Edit-menu and Portal-Button
Even if we made some tools and guides to make the above easier to use, we cannot provide any support for these features.
More specifically: Anything related to TrueTool has been deprecated and is now replaced with HeavyScript, any guides still referring to TrueTool will be updated or replaced.
Installing Apps
Once you’ve added the TrueCharts Catalog to your SCALE installation, you can choose from hundreds of apps to install through the catalog user interface.
- Your Apps pool must be configured before adding TrueCharts. When opening the Apps menu item on SCALE for the first time, you’ll be prompted to choose a storage pool for your Apps. See our system requirements page to ensure you’re good to go.
- After creating your Apps pool, you’ll be able to add the 3rd party TrueCharts catalog.
Requirements
- Your SCALE Apps has the TrueCharts catalog added and meets the minimum system requirements mentioned above
- You have a working Internet connection and can reach GitHub and truecharts.org from the host system
- If you plan to add additional app storage to your app, review important information about app storage and host path validation.
Adding the App
To add a new TrueCharts app to your SCALE installation:
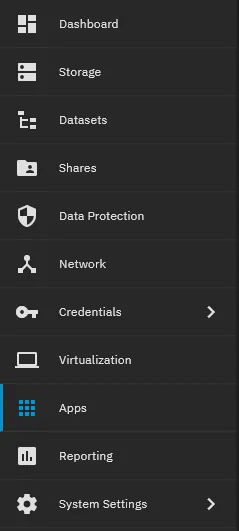
- Click Apps from the SCALE menu
- Go to Discover Apps at the top-right of the Apps page

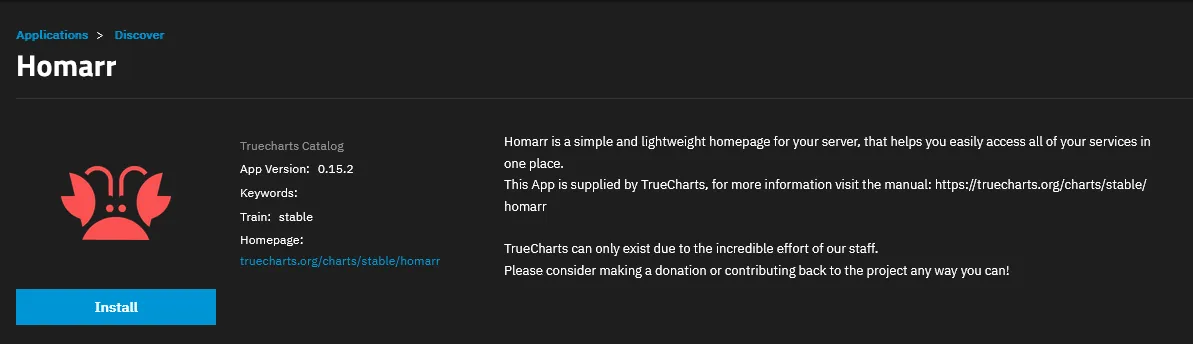
- Find the app you wish to install using the search bar (or by scrolling through the catalog), e.g. Homarr, and click the Install button.
- Configure your app for each section depending on your desired settings out the necessary information to configure your app for each section and click Next. Application Name: Configure a custom name for your app and select a version to install. General Settings: Choose the number of replicas, preferred timezone, and add custom environmental variables. Networking & Services: Choose how you’d like to expose your app from the k3s network to your local network and the Internet. Storage and Persistence: Configure core app storage and add additional app storage. Ingress: For TrueCharts apps you can configure Ingress with Traefik to easily proxy Internet traffic to your app. Security & Permissions: Configure PUID, fsGroup, and other security and file permissions for your app. Other Options: You can also configure GPU support, addons (such as adding a CodeServer for easy file editing), and advanced app settings.
- Once you’ve finished configuring your app, click Install to start the deployment process.

Give your app a few minutes to deploy. You can check its status in the SCALE task manager at the top right of your GUI.
Video Guide
Notes
- You can view specific configuration information about your app in its app-specific page by searching for it in the charts list, searching our guides, or by searching for threads about it on the TrueCharts Discord.
- If you see both an
incubatorandstableversion of an app in the TrueCharts catalog, you should always use thestableversion as it is the best maintained version. - Some apps are available in both the TrueCharts catalog and iXsystems default catalog. We recommend and only support the TrueCharts version of an app for access to features and capability alignment.
- Once an app is thoroughly tested and known to be stable, it can be moved from the
incubatortrain to thestabletrain. You can let the TrueCharts team know if a particular app appears to be working well enough to be moved to thestabletrain.
Editing Apps
Editing Apps is possible since 21.08, although it has a slightly different GUI it exposes the same setting as installing an App.
Requirements
- Make sure your storage-pool is created and working
- Make sure you selected your storage-pool when you first opened the “Apps” interface, if not please refer to Configuring your Apps Pool
- Make sure you have a working internet connection and can reach github and truecharts.org from the host system.
- Make sure you already added the TrueCharts catalog from Adding TrueCharts to SCALE
- Make sure your App is installed and, preferably, working
Editing the App
- Go to the
Appspage of the SCALE GUI - Select your desired app to edit from the list of installed apps
- Select the
Editbutton - Change any settings you want to change
- Submit your changes.
The App will then go through a process of submitting your changes. If the process fails, your changes will not be submitted and the edit will be reverted. Once the process popup disappears, it might take a few minutes to actually deploy your new changes, due to some things that happen in the background.
Video Guide
Notes
- It’s NOT advisable to switch between Nodeport and Loadbalancer, using the same ports. This WILL cause problems. If you edit an app and switch between NodePort and Loadbalancer, please be sure to use different ports.
Upgrading
Upgrading the app using the SCALE GUI
- Go to the
Appspage of the SCALE GUI - Make sure your App reports that an Upgrade is available on the App Card
- Make note of the current version, you might want to revert to this version in the future
- Select
UpgradeorUpdate - Confirm you want to upgrade, checking the changelog for any potential issues such as breaking changes.
The App will then go through a process of backing up(!) and upgrading. If the process fails, your changes will not be submitted and the edit will be reverted. After the process popup disappears, it might take a few minutes to actually deploy your newly upgraded app, due to some things that happen in the background.
Upgrading the app using HeavyScript
Alternatively, you can also use HeavyScript to update your apps and even configure it to do so automatically via a CRON job. Examples and instructions are found on the previously linked page and the HeavyScript Github, also linked on that page.
Rollback an app
Reverting using the GUI
- Select the app you wish to rollback from the list of installed apps
- Select “Roll Back”
- Under “Version” - Click the dropdown and select which version you would like to rollback to
- Check the “Roll Back Snapshot” box
- Select “Roll Back”
Wait a few moments for the process to happen in the background and you should soon be greeted by the prior version of the app deployed and running.
Reverting using the CLI
- Enter cli to enter the SCALE command line interface
- Enter app chart_release rollback
It should give you this screen:

- Enter the release name and item_version like this:

- Click save then click quit
It should show something like this, confirming the rollback:

Finding the last installed version
SCALE does not list which versions are available to roll-back to, but does required a version to be entered. There is a short walk-through to get the versioning history for the app in question:
- Run
export KUBECONFIG=/etc/rancher/k3s/k3s.yaml - Run
helm history jackett -n ix-jackettwhere “jackett” should be replaced with the name of the App that broke your UI. You’ll see this:
Delete
Delete using the GUI
- Select the app you wish to delete from the list of installed apps
- Select “Delete”
- Check the “Confirm” box
- Select “Continue”
Wait a few moments for the process to happen in the background.
Delete using the CLI
- Enter the SCALE terminal via the GUI or SSH
- Type the following command
cli -c 'app chart_release delete release_name=NAME_OF_APPLICATION'- ex:
cli -c 'app chart_release delete release_name=traefik'